Single Sign-On (SSO)
Your team can sign in to Plausible Analytics using single sign-on (SSO). This removes the need for manual account creation, simplifies access management and gives you more control over who can log in.
SSO works by logging in through an identity provider (IdP). We support the SAML 2.0 protocol, which is compatible with most IdPs including Google Workspace, Okta and Microsoft Entra ID (Azure AD).
User accounts are provisioned just-in-time. As long as the IdP session is active and the email matches, users can log in to Plausible automatically.
Security Assertion Markup Language (SAML) is an XML-based protocol for secure exchange of information between an authority (Identity Provider or IdP) and a consumer (Service Provider or SP - in this case, Plausible).
How it Works
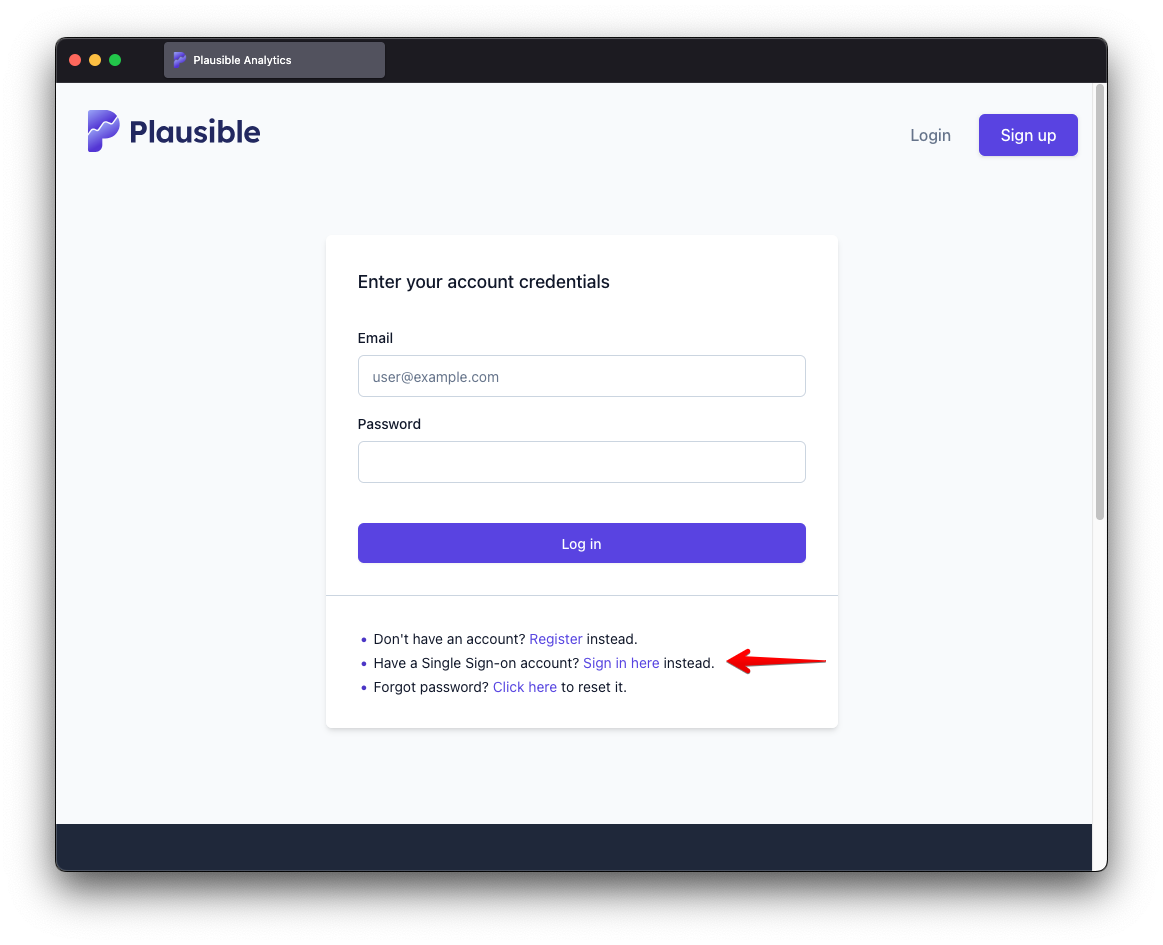
Once SSO is configured and your users have valid identities with your chosen identity provider, they can log in using a dedicated SSO login form.
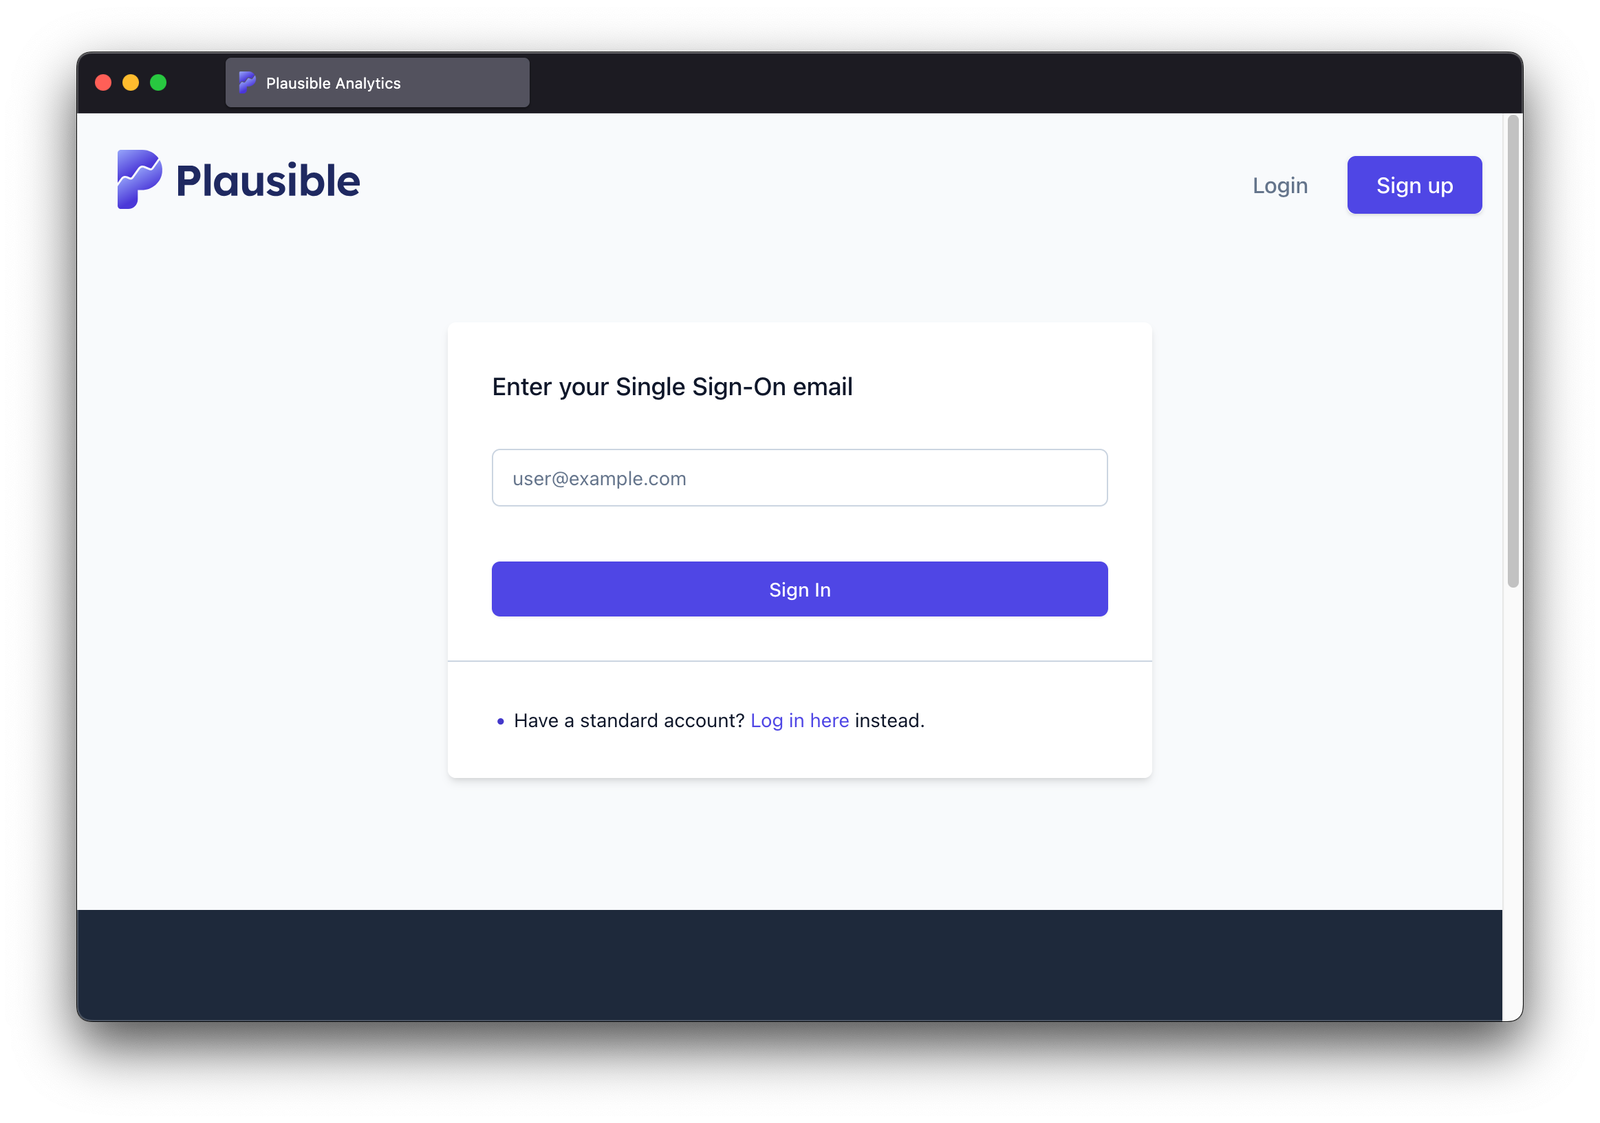
After entering the email, they are redirected to identity provider's portal. The provider validates their identity if they haven't logged in there yet or uses an already validated identity from an existing session. The identity information (email, name) is then securely sent back to Plausible. At that point, their account is automatically created in Plausible. No manual setup needed.
Provisioning
When someone logs in through SSO, we will first check if there's an existing team member with a matching email address and SSO configuration. If a match is found, they're logged in as that user. If not, a new user would be created automatically and added to the team whose configured SSO domain matches the email’s domain.
By default, new members are assigned the Viewer role, but you can change it as needed.
A user signing in through SSO can only belong to one team. Team assignment is based on the domain in their email address. Each SSO domain must be unique: a single domain can't be linked to more than one team at once.
You can read more about domains at SSO Domains.
Security
When you configure SSO for your team for the first time, existing members can still log in using their email and password. However, once a member signs in via your identity provider, their account becomes SSO-only: they can no longer use standard login credentials.
Standard and SSO users can coexist on the same team as long as the "Force Single Sign-On" option is disabled.
Once "Force Single Sign-On" is enabled, only SSO users are allowed to access the team. If there are still standard users among members, they are locked out of the team until they provision their account through identity provider.
There's an exception made for team Owners who retain the ability to log in using email and password, even after using SSO. This is to allow for troubleshooting issues with SSO configuration or a malfunctioning identity provider.
To enable "Force SSO," Owners must first activate two-factor authentication (2FA) for added security.
By not enforcing SSO immediately, you can safely transition your team without causing disruption.
Other
- Changing name and email of your SSO account: The name and email address can only be updated via identity provider.
- SSO initiated from IdP: Identity providers often support starting login directly from their portal. While this is sometimes convenient, we explicitly do not support it for security reasons. Users must always start logging in from Plausible's login form.
Configuring SSO
Before starting configuration, make sure you have created a team and subscribed it to a plan with SSO enabled.
The configuration process consists of four major stages:
- Initiating SSO Setup in Plausible
- Configuring SAML SSO in Identity Provider
- Finishing SAML SSO Setup in Plausible
- Enabling SSO Enforcement
Initiating SSO Setup in Plausible
-
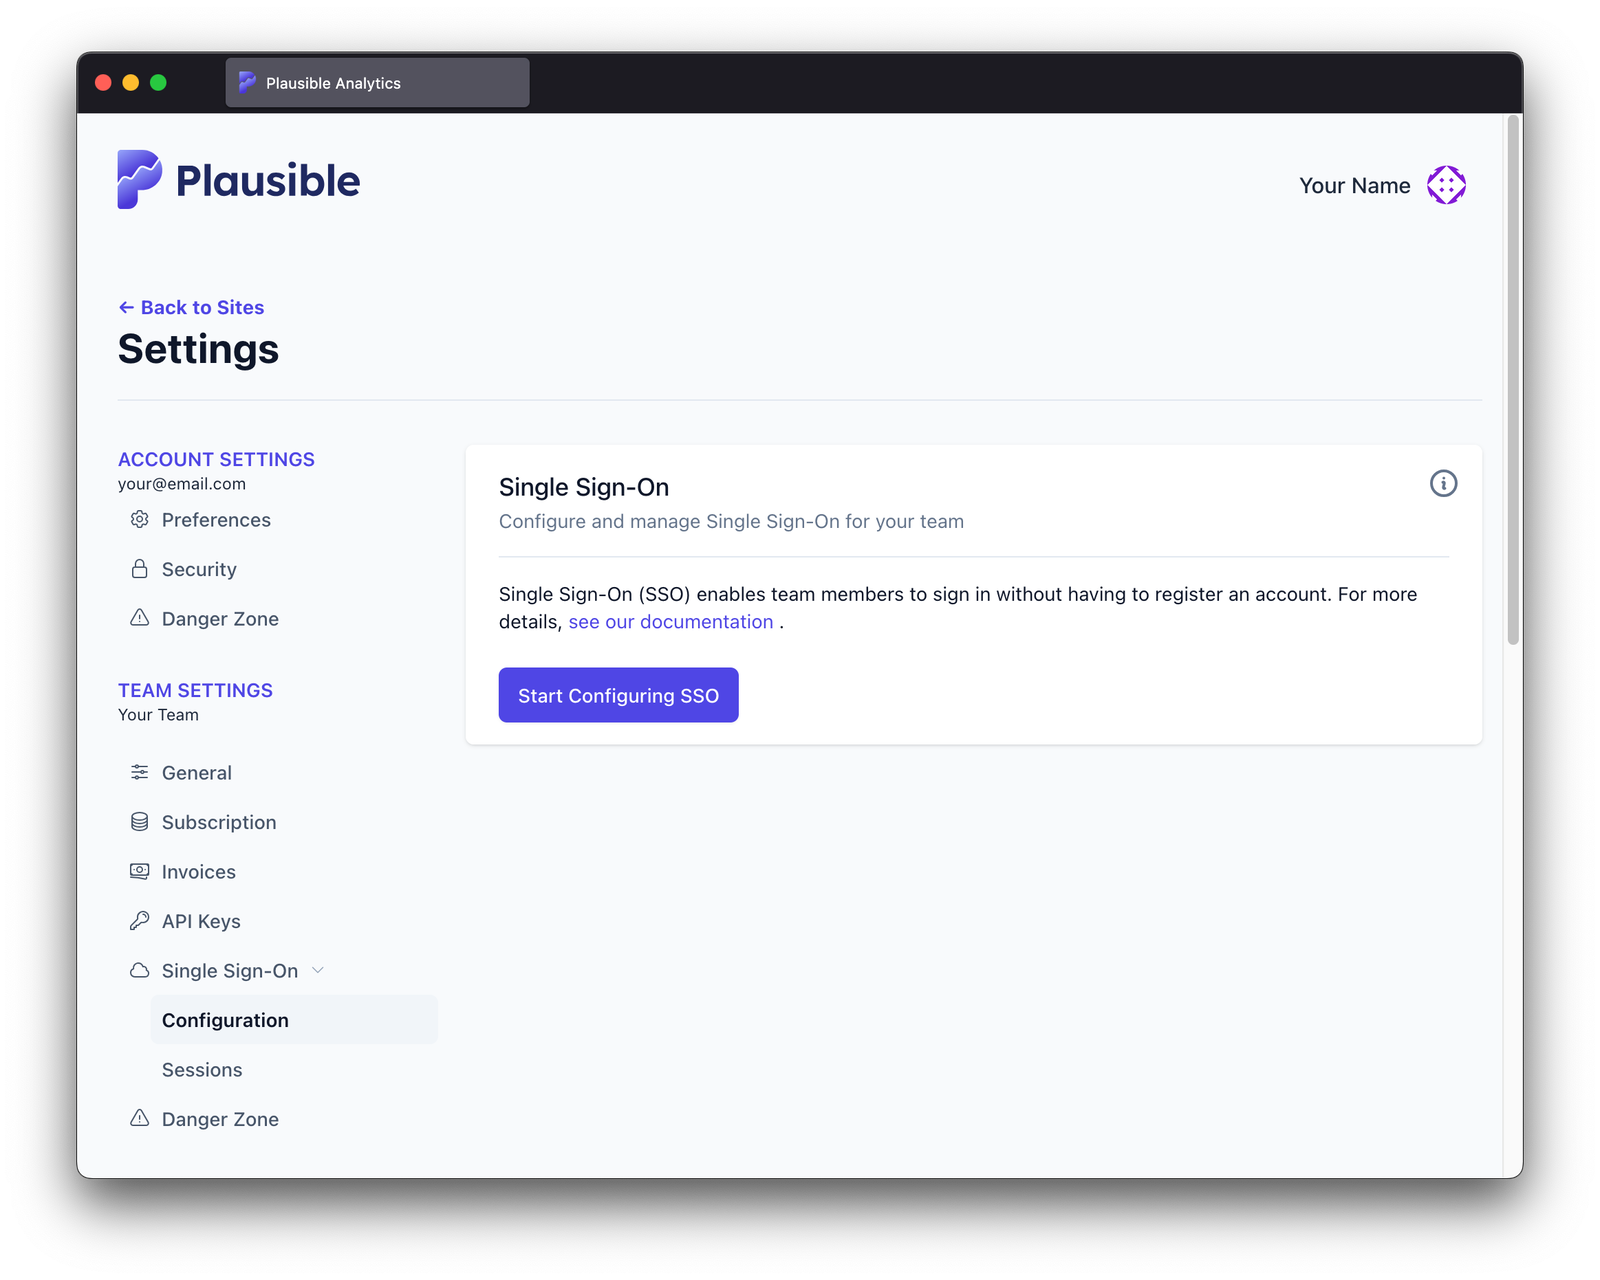
Go to the Configuration section of Single Sign-On under Team Settings.
-
Click the Start Configuring SSO button.
-
Open identity provider's administrative dashboard and follow further instructions.
Configuring SAML SSO in Identity Provider
The configuration procedure varies significantly from provider to provider. We provide instructions for the most commonly used identity providers below.
When setting up SAML SSO for any other identity provider, please keep the following in mind:
- The
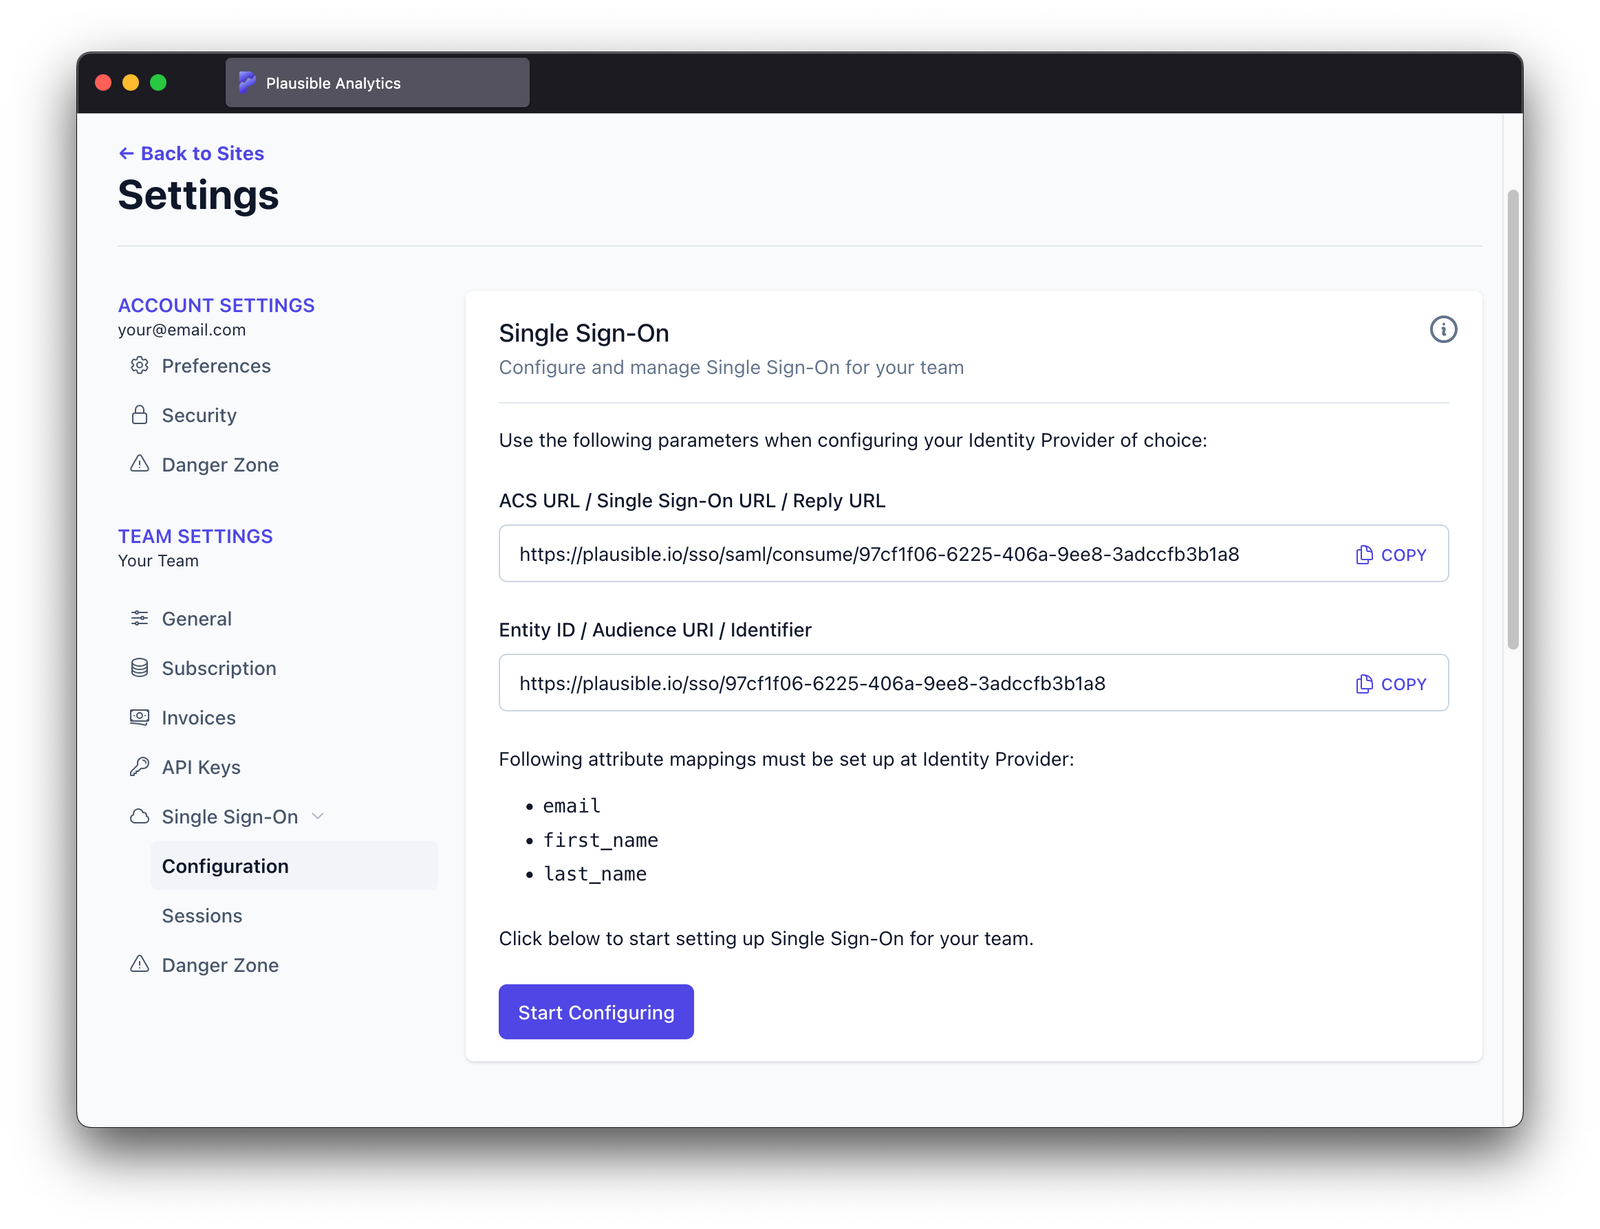
NameIDattribute must be a persistent and unique value that does not change between user sessions. This value identifies the user. This is the default for most identity provider services. For self-hosted IdP instances, you have to ensure it's configured properly. - ACS URL / Single Sign-On URL / Reply URL: Enter the URL you have obtained in the previous stage. This URL is unique to your workspace and is an entry point for accepting identity information obtained from identity provider. Some identity providers also call it Consumer URL.
- Entity ID / Issuer / Identifier: Enter the ID you have obtained in the previous stage. This is a unique value identifying your team. Some identity providers also call it Audience or SP Entity ID
- Attributes: Some identity providers also expose them under Attributes & Claims or Attributes Statements. Make sure you have created and properly mapped following attributes in your identity provider:
email- at least one of
first_nameorlast_name
Step-by-step instructions for commonly used identity providers:
Finishing SAML SSO Setup in Plausible
-
Go back to Configuration section of Single Sign-On under Team Settings and click Start Configuring.
-
Fill the form with parameters obtained after configuring identity provider and click Save.
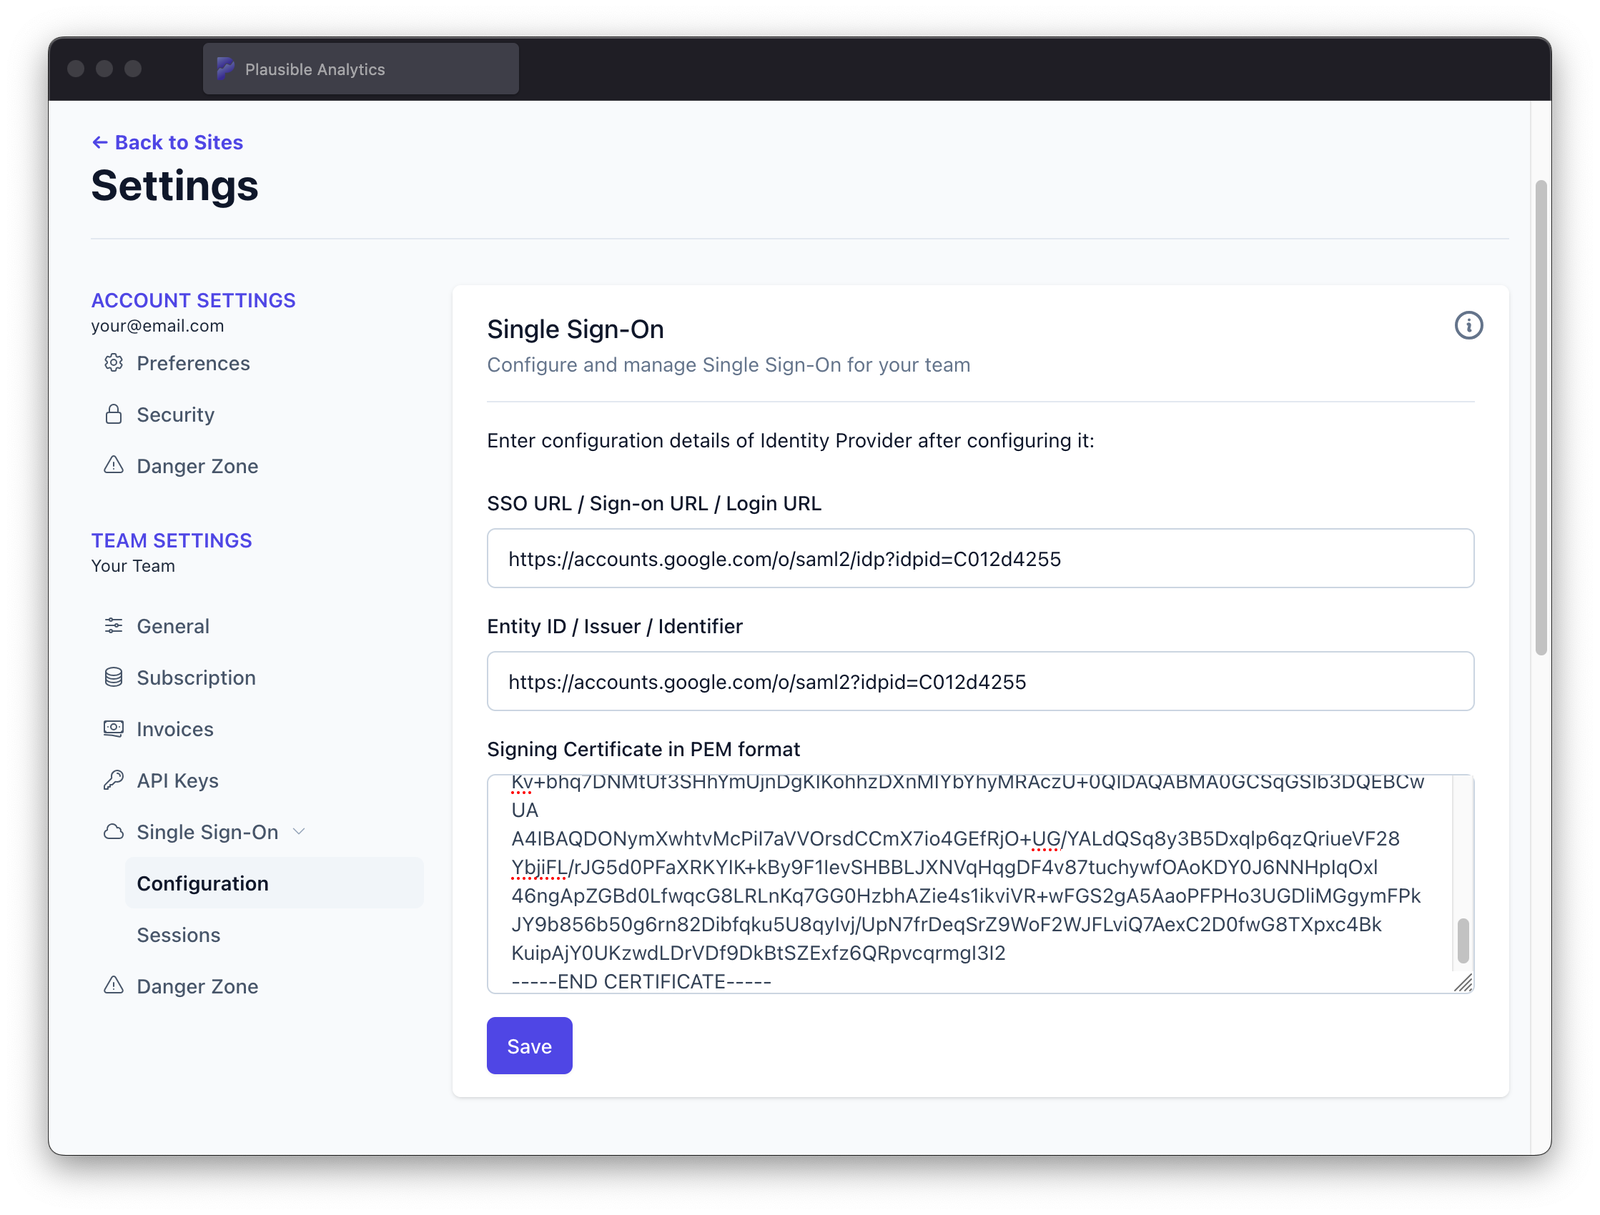 Make sure to not mix up the inputs!
It's pretty common for SSO URL / Sign-on URL / Login URL and Entity ID / Issuer Identifier to contain very similar URLs. It's easy to mistake one for the other. This can result in weird behaviour when trying to log in via SSO login form, like browser downloading a file instead of redirecting to identity provider's portal.
-
Enter domain name used in email addresses of identities that should be allowed to log in to this team through SSO and click Add Domain.
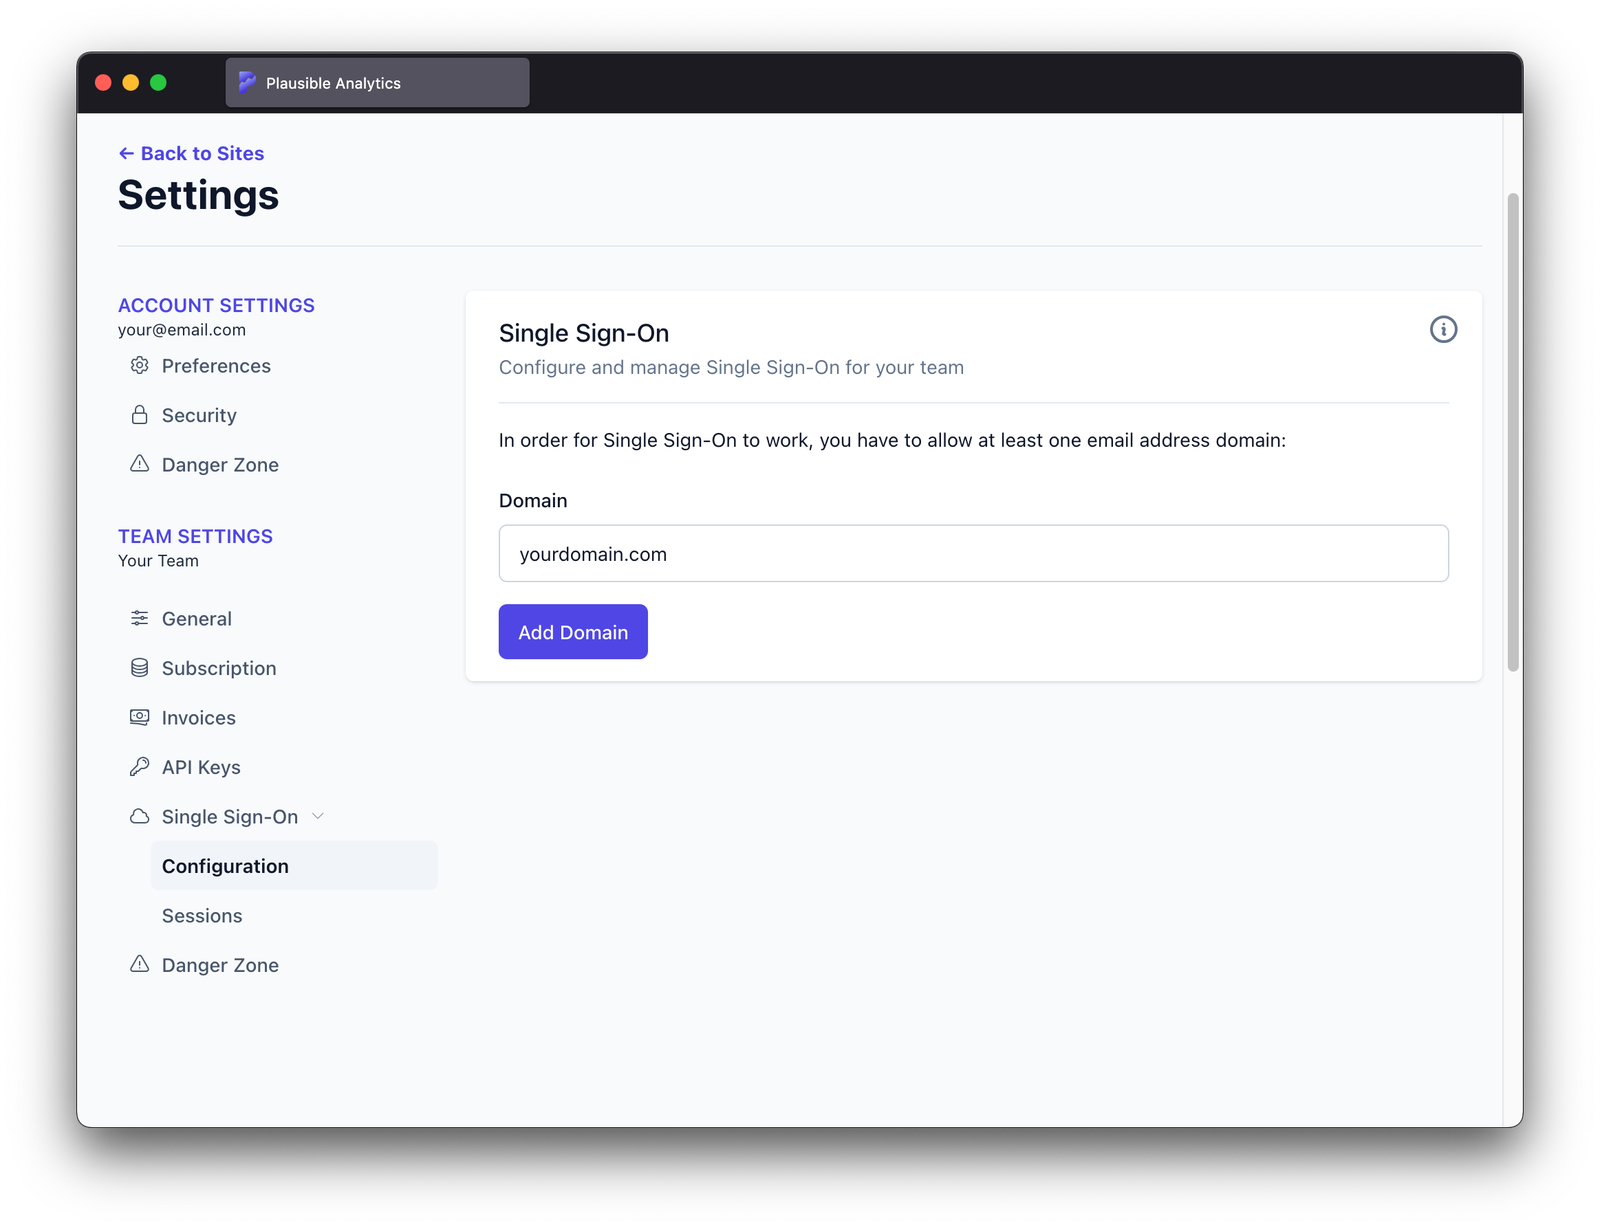
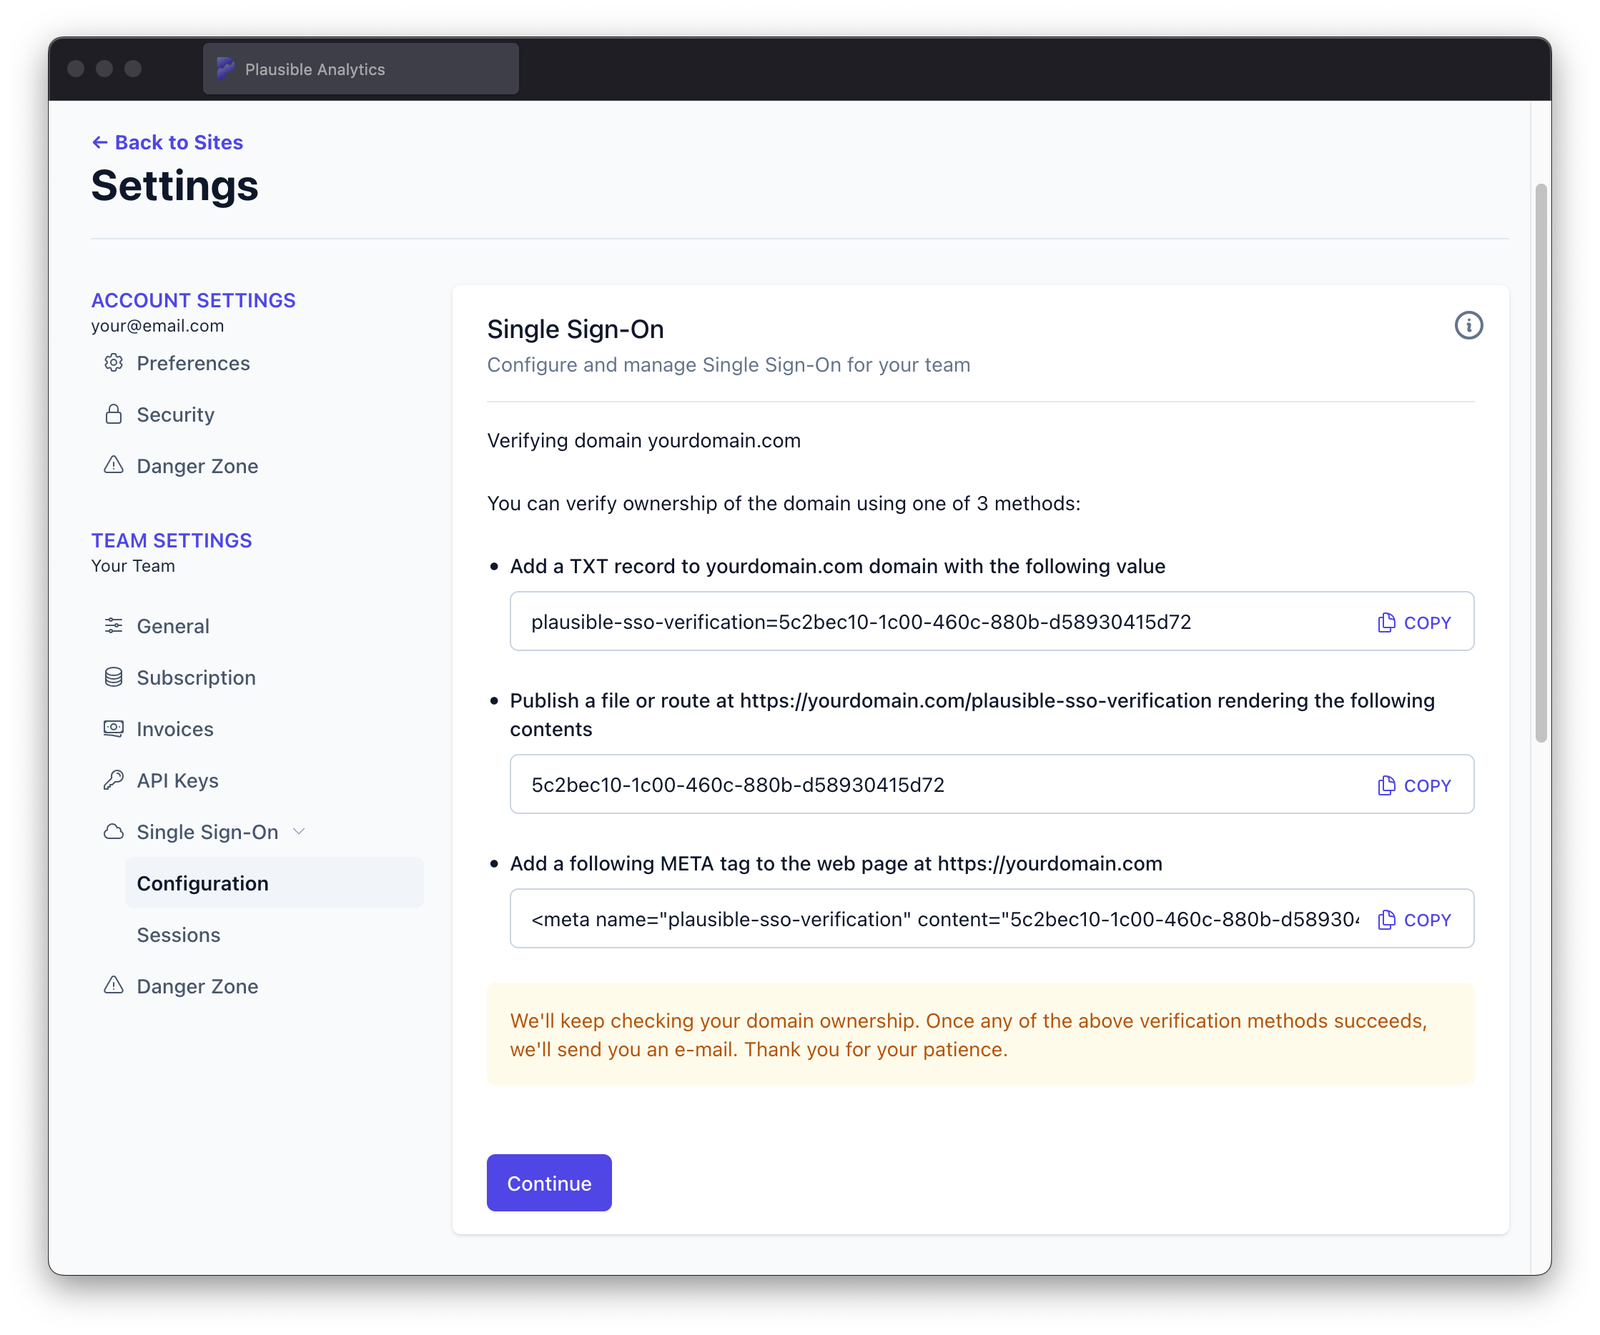
-
Verify ownership of the domain using one of three methods. After publishing updated page or DNS record, click Continue.
-
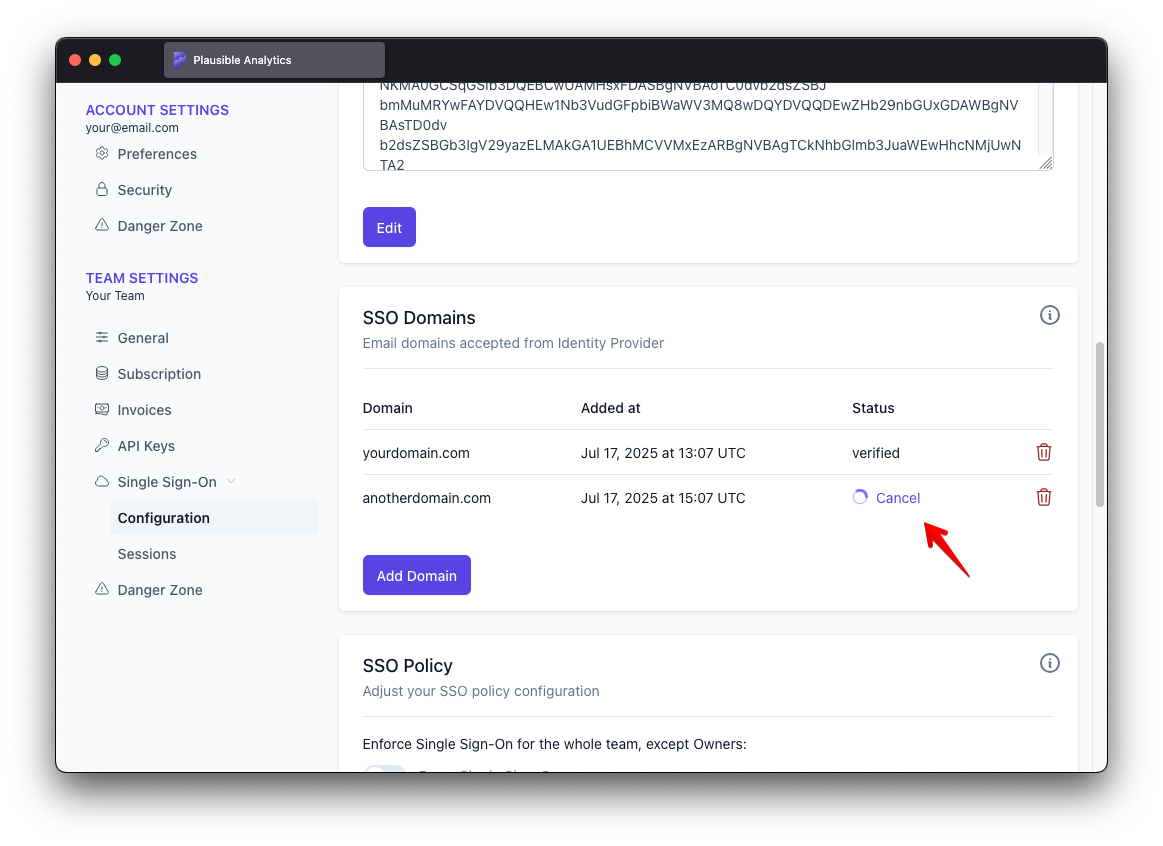
Scroll to SSO Domains and wait until Status changes to "validated".
Validation taking too long?You can click Cancel at any time and then click Verify, optionally review verification instructions and then kick off verification again by clicking Run Verification Now
-
Once the verification succeeds, the domain is marked as verified.
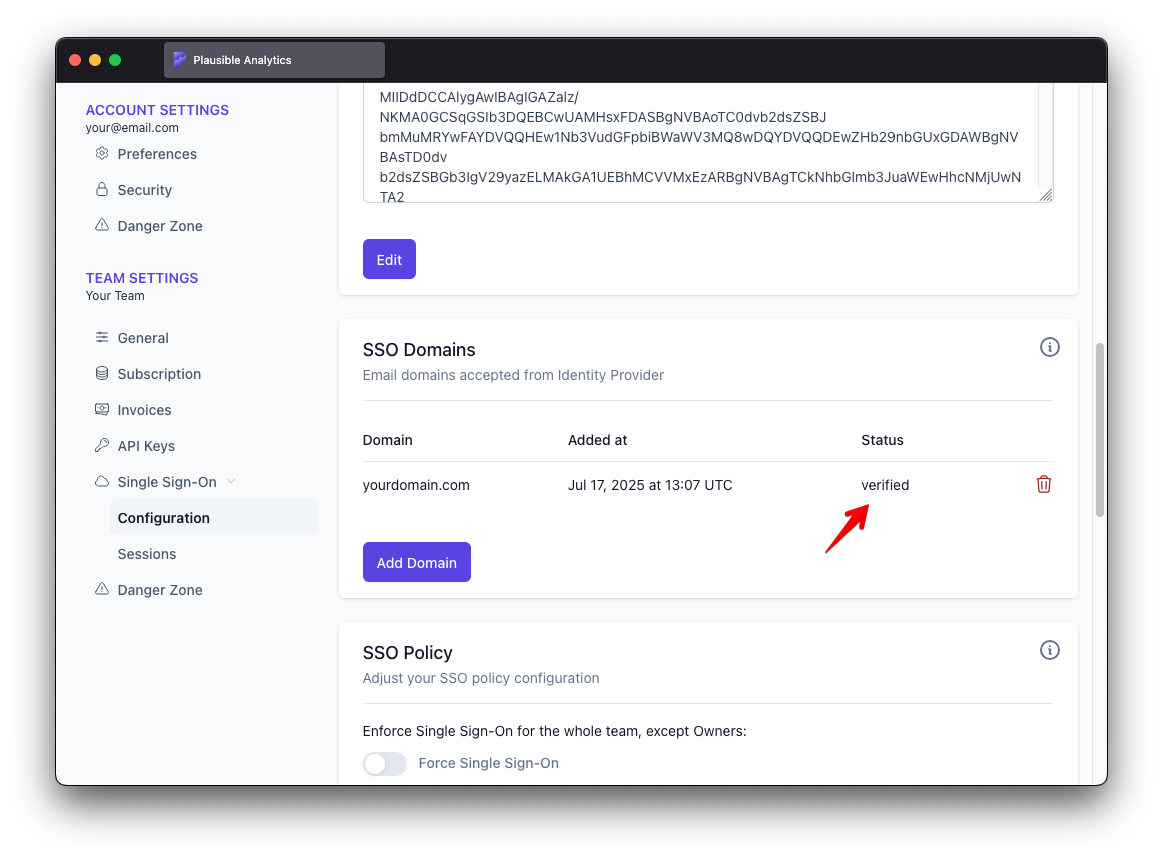
From that point on, SSO should be fully functional and it should be possible to log in using an identity email configured at identity provider.
Enabling SSO Enforcement
While this step is not strictly necessary to use SSO, it's important for ensuring only members provisioned through identity provider have access to the team.
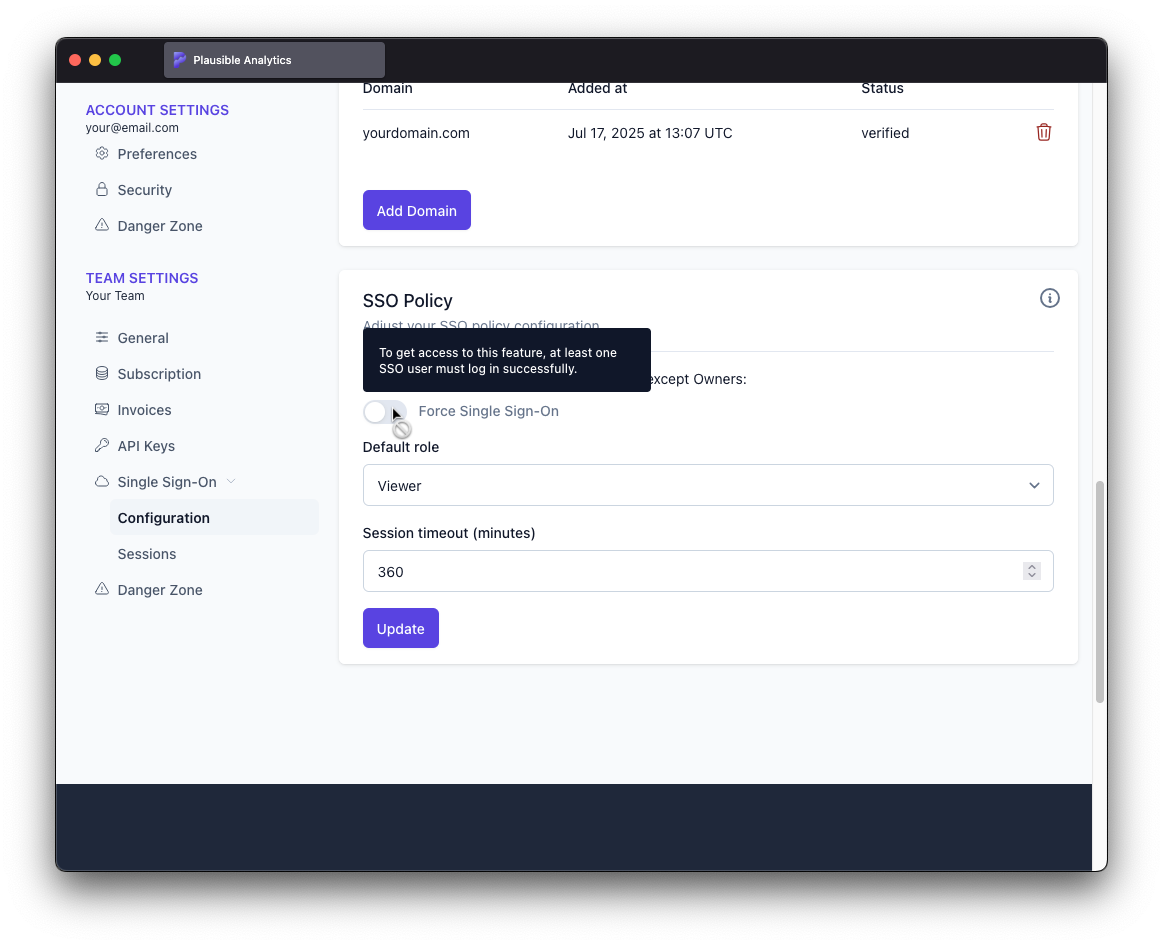
SSO enforcement can be enabled from SSO Policy section of SSO configuration.
There are conditions that have to be met before "Force Single Sign-On" can be enabled though.
- At least one SSO domain must be verified
- At least one user must have successfully logged in through identity provider
- All Owners must have 2FA enabled
It might happen in a team with multiple Owners that some of them might be away and not able to enable 2FA right away. One way to resolve this is temporarily changing their role to Admin. Once they are back, they can log in through identity provider, enable 2FA and ask to have their role changed back to Owner.
If any of those conditions are not met, the switch is disabled and the reason is outlined once you hover over it.
Once all conditions are met and you enable enforcement, logging in through identity provider will be the only way to access the team.
Providing this fallback is important to provide a way to resolve issues with misconfigured or malfunctioning identity provider. Please note, however, that Owners must still log in at least once through identity provider in order to access the team with Force Single Sign-On enabled.
SSO Domains
Before it's possible to log in through SSO, you need to add at least one domain and verify its ownership using one of the three available methods. SSO will not work until a domain is added and verified, even if SAML is fully configured.
When someone tries to log in via SSO, Plausible checks the domain part of their email address (the part after the “@”) against your configured domains. If a match is found, the user is redirected to the appropriate identity provider for authentication.
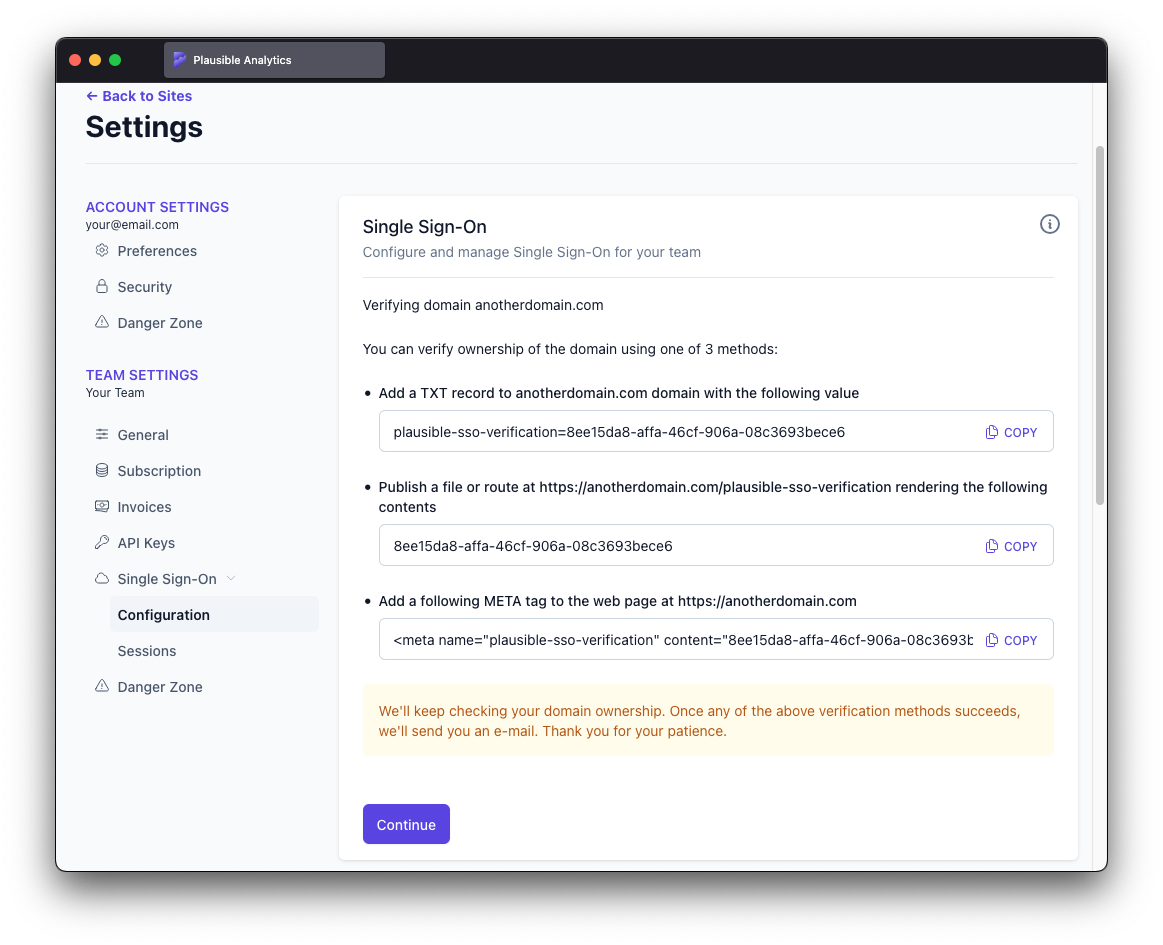
The ownership of every added domain must be verified using one of three methods:
- Adding a TXT DNS record to the root domain
- Publishing a file or exposing a route from the web page under the domain
- Adding a META HTML tag to the web page under the domain
Once started, the verification process is retried in the background over the following hours until it succeeds. Once it's verified or fails after too many attempts, you will be notified by email. Verification can be immediately retried by canceling the running process and kicking off verification again.
DNS Record Verification
A DNS record of type TXT must be configured for the root domain with plausible-sso-verification=<domain identifier> for content. DNS record update takes some time and verification might have to be retried a couple times before it succeeds.
File or Route Verification
You have to either upload a file named plausible-sso-verification to the public root folder of the web page under the verified domain or expose a route at https://<domain>/plausible-sso-verification with <domain identifier> as its only content. The verification should be immediate unless there's aggressive web service caching involved.
META Tag Verification
You have to put <meta name="plausible-sso-verification" content="<domain identifier>"> in the HEAD section of the web page under the domain. The verification should be immediate unless there's aggressive web service caching involved.
SSO Policy
SSO policy can be configured from Configuration section of Single Sign-On under Team Settings.
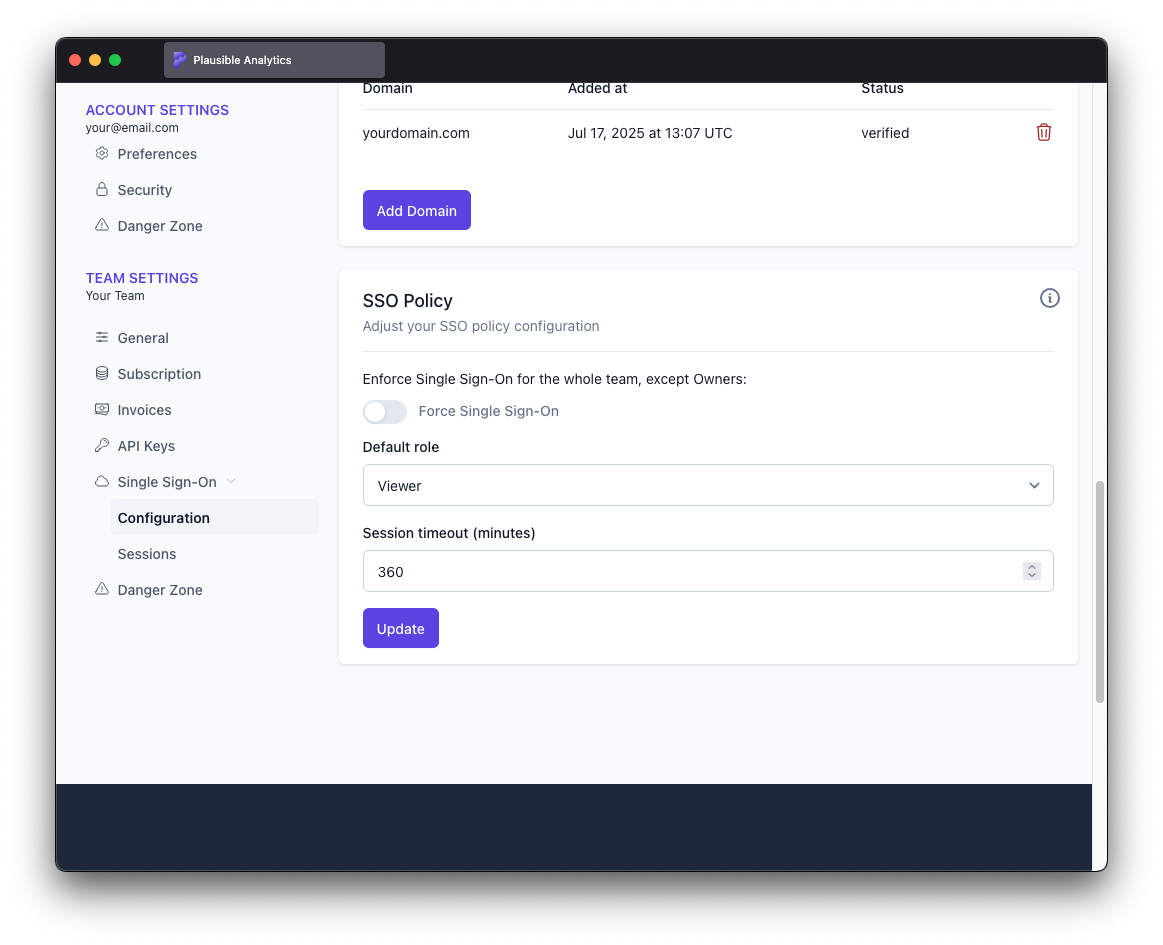
Following settings are available:
- Force Single Sign-On: Whether to restrict access to the team only for users logging in through SSO. You can read more about it at Enabling SSO Enforcement. Disabled by default.
- Default role: The team role assigned to members who log in through SSO for the first time and don't have a Plausible account yet. Default is Viewer.
- Session timeout (minutes): Session timeout for users logged in through SSO. Maximum is 12 hours. Default is 360 minutes (6 hours).
SSO account session timeout in Plausible is always counted relative to the time of last login, not user activity. Unlike standard accounts, simply staying active won’t extend the session. However, this doesn’t mean users need to manually log in again when the session expires. When the timeout is reached, Plausible automatically redirects to your identity provider. If the user's session is still valid there, they’re seamlessly returned to Plausible, right back to the last page they visited. Plausible's session timeout is typically shorter than the one configured at your identity provider. This helps keep user access in sync. For example, if a user's identity is removed at the provider level, their Plausible session will expire shortly after, limiting unauthorized access.
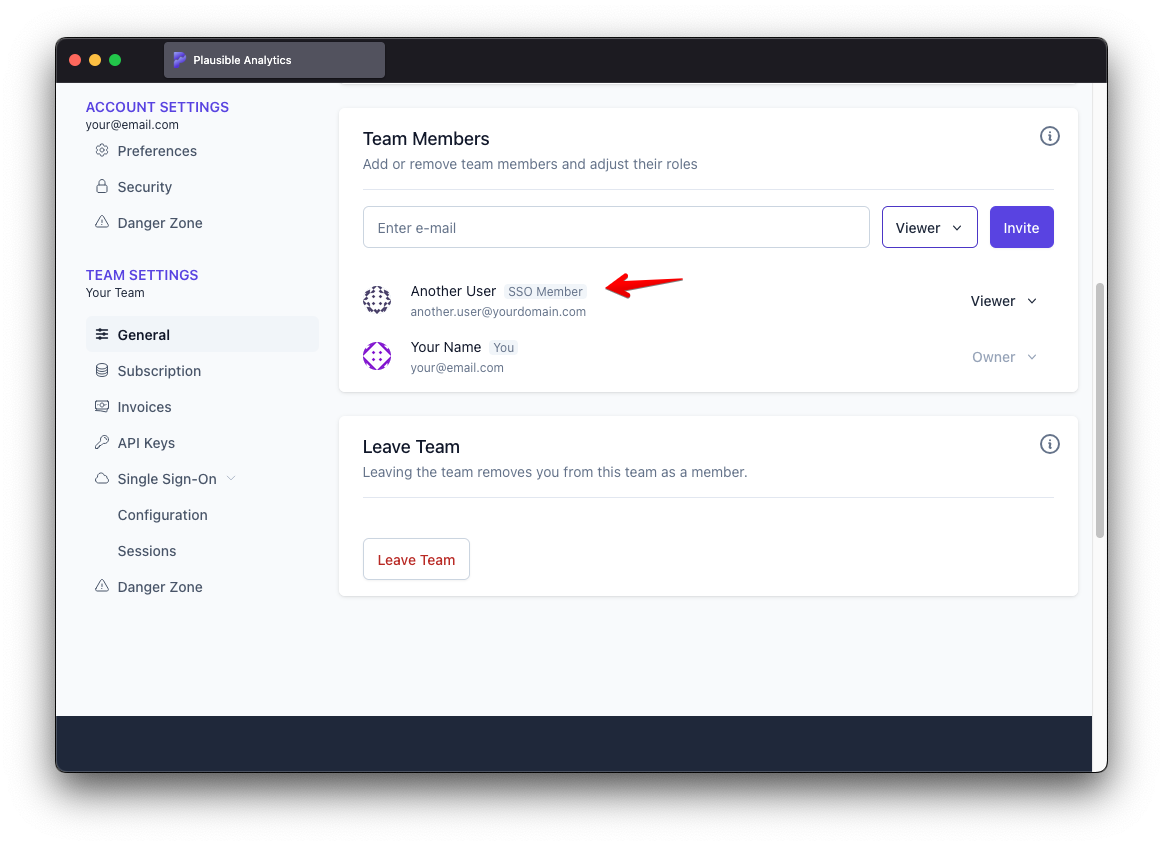
Team Management
- Team members who have already provisioned their accounts through SSO are distinctly labeled as such on members list under Team Settings
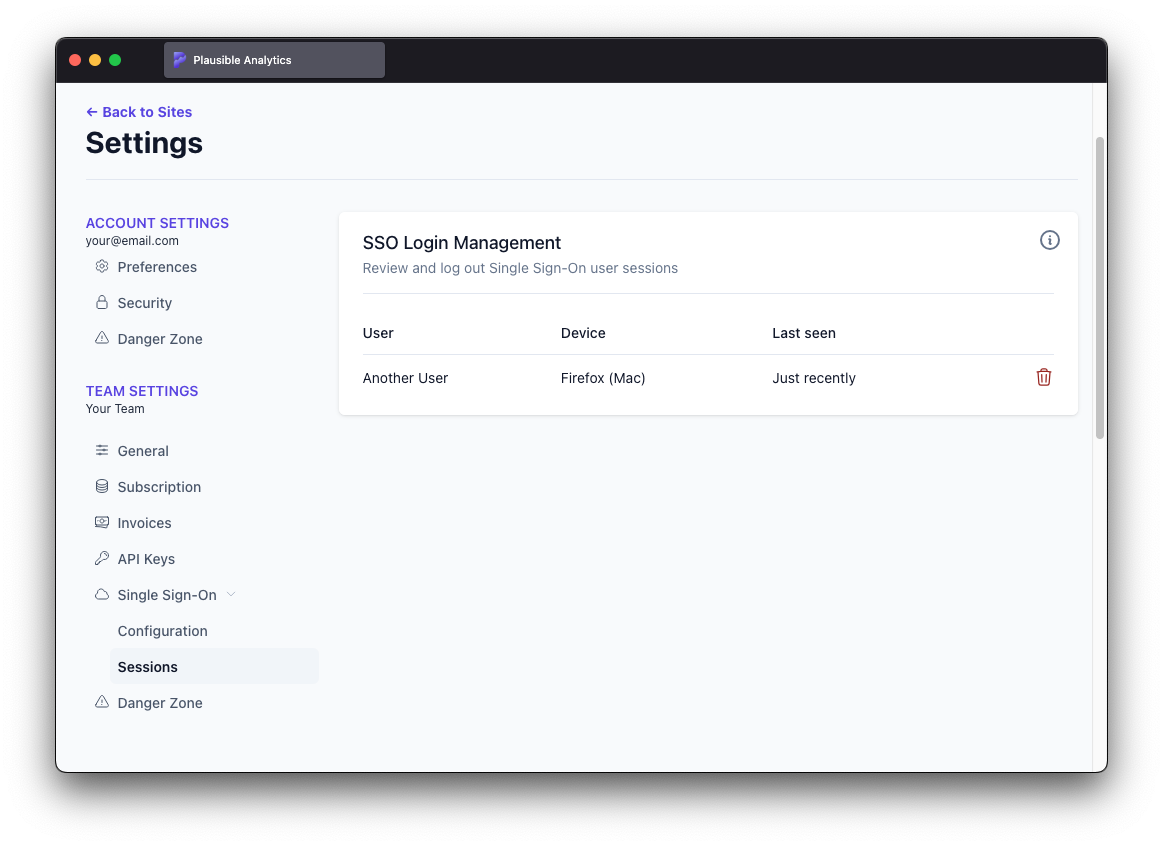
- All team members' active SSO sessions can be viewed and optionally logged out in Sessions section of Single Sign-On under Team Settings