How to set up Plausible Analytics with our Google Tag Manager template
Plausible Analytics is an easy-to-use, lightweight, and privacy-friendly Google Analytics alternative.
If you already use Google Tag Manager (GTM) to manage scripts on your site, you can integrate Plausible with it, no need to touch your website’s code. GTM lets you keep all your scripts organized in one place and makes it easy to update or remove tags later on.
We’ve built a Plausible GTM template to make this setup even smoother.
This GTM integration method is optional. You can always use the direct Plausible setup instead, it’s even simpler and only takes a few lines of code to get started. If you’re using another platform, you can also check out our integration guides for instructions specific to your setup.
- Why use Plausible Analytics?
- Before you begin
- Get started with Plausible Analytics
- Install the Plausible template in GTM
- Test your setup
- What’s next?
Why use Plausible Analytics?
Plausible is built to give you privacy-friendly, lightweight analytics with a clean, modern dashboard and minimal overhead. We don’t collect personal data, so you can avoid many GDPR/CCPA consent headaches.
Unlike feature-heavy tools, Plausible surfaces the key metrics you care about (engagement, top pages, referral sources, conversions) on one clean interface.
Before you begin
Make sure you have:
- Access to your Google Tag Manager account.
- A Plausible Analytics account (you can create one as shown below).
- The ability to edit or publish containers in GTM.
Get started with Plausible Analytics
To use Plausible Analytics, you need to register an account if you haven’t already. To help explore Plausible, we offer a free 30-day trial (no credit card required). Click here to register.
Once you have:
You will see the following screen, where you can select “Tag Manager” from the 4 tabs depicting the 4 different installation methods.
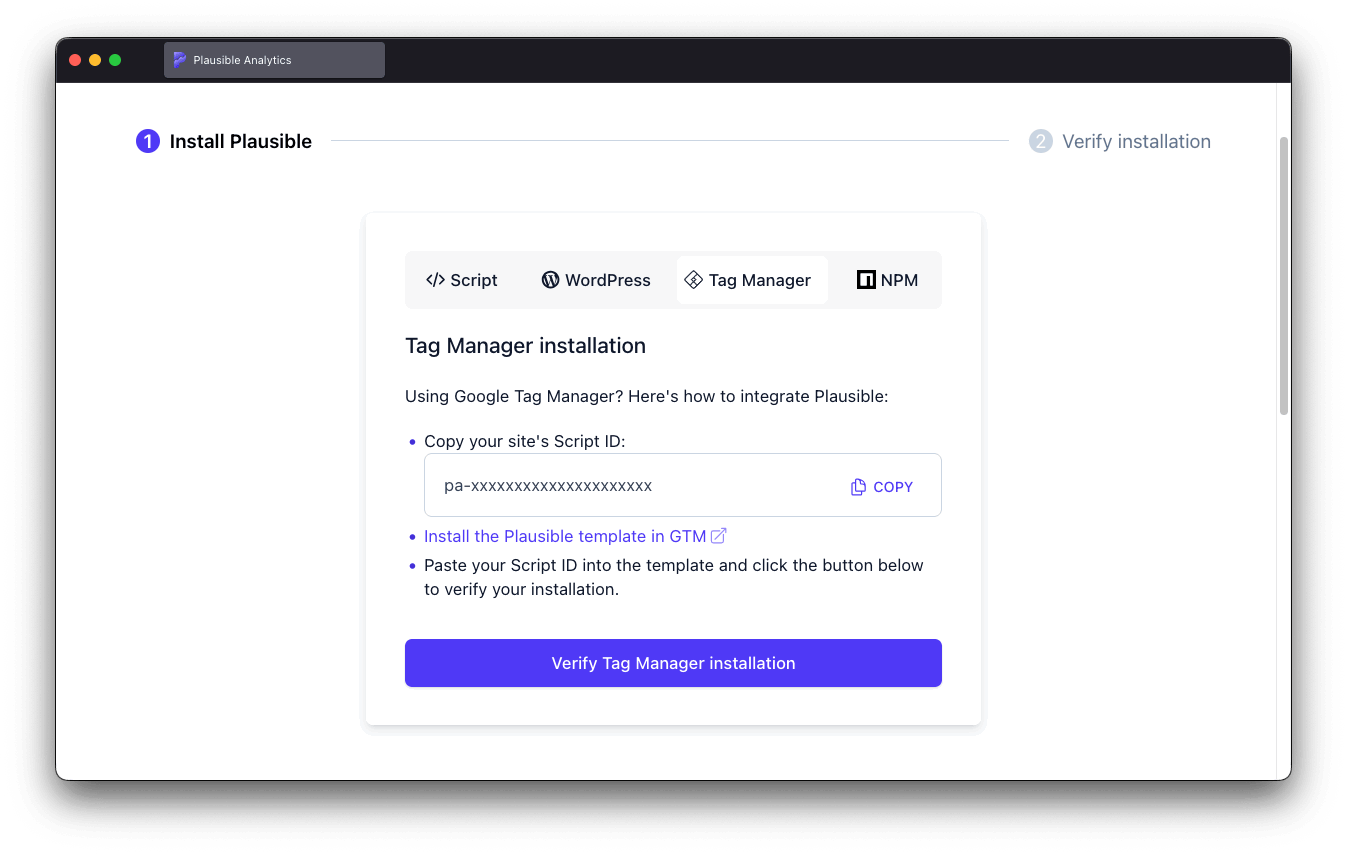
You can also always come back to this screen if you have an existing account, in the “Site installation” area under “General” in your site settings.
Once on this screen, copy the displayed site’s script ID and save it for later as you’ll need it in a couple of minutes.
Install the Plausible template in GTM
The simplest way to install the custom template is to locate it in the Google Tag Manager template gallery where you can install it directly from your Google Tag Manager dashboard. Here’s the direct link to the Plausible Analytics GTM template.
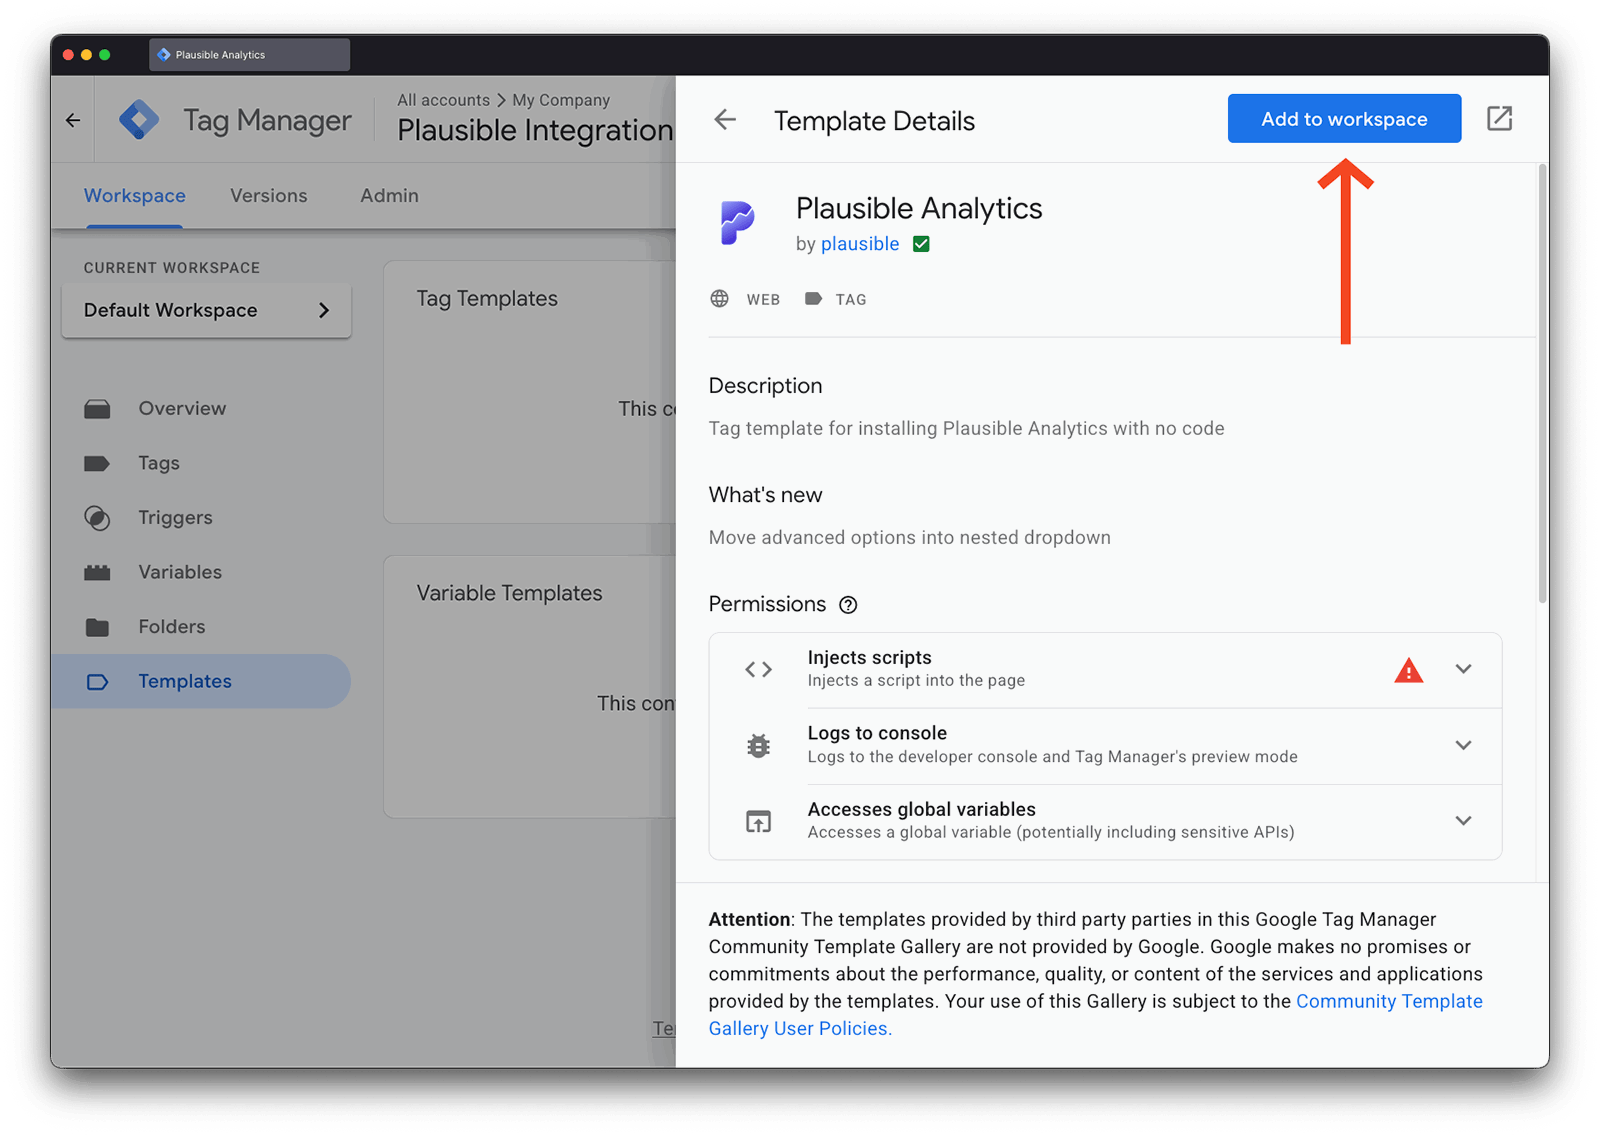
Create a new Tag
Once you’ve installed the template, you should create a new “Tag” that uses it. To do this:
In the main Google Tag Manager dashboard, browse to “Tags” and click “New” to create a new tag.
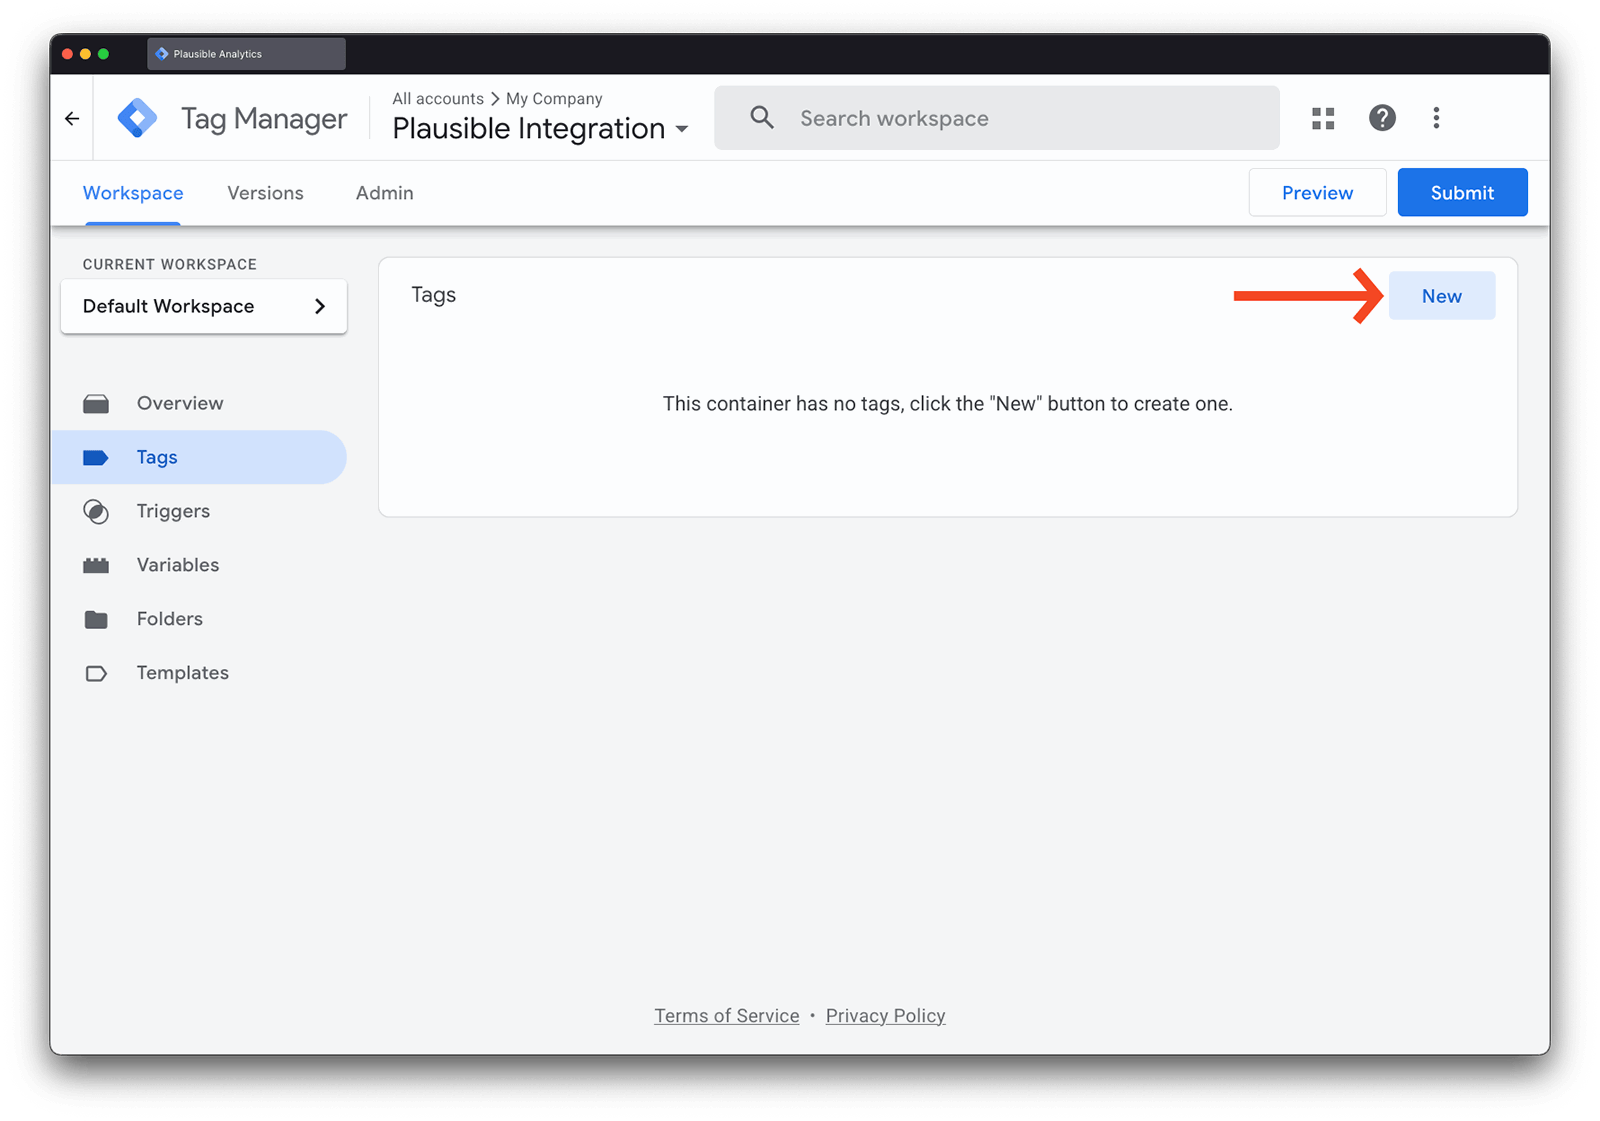
From the list of available tag templates, choose the Plausible Analytics tag template you just installed.
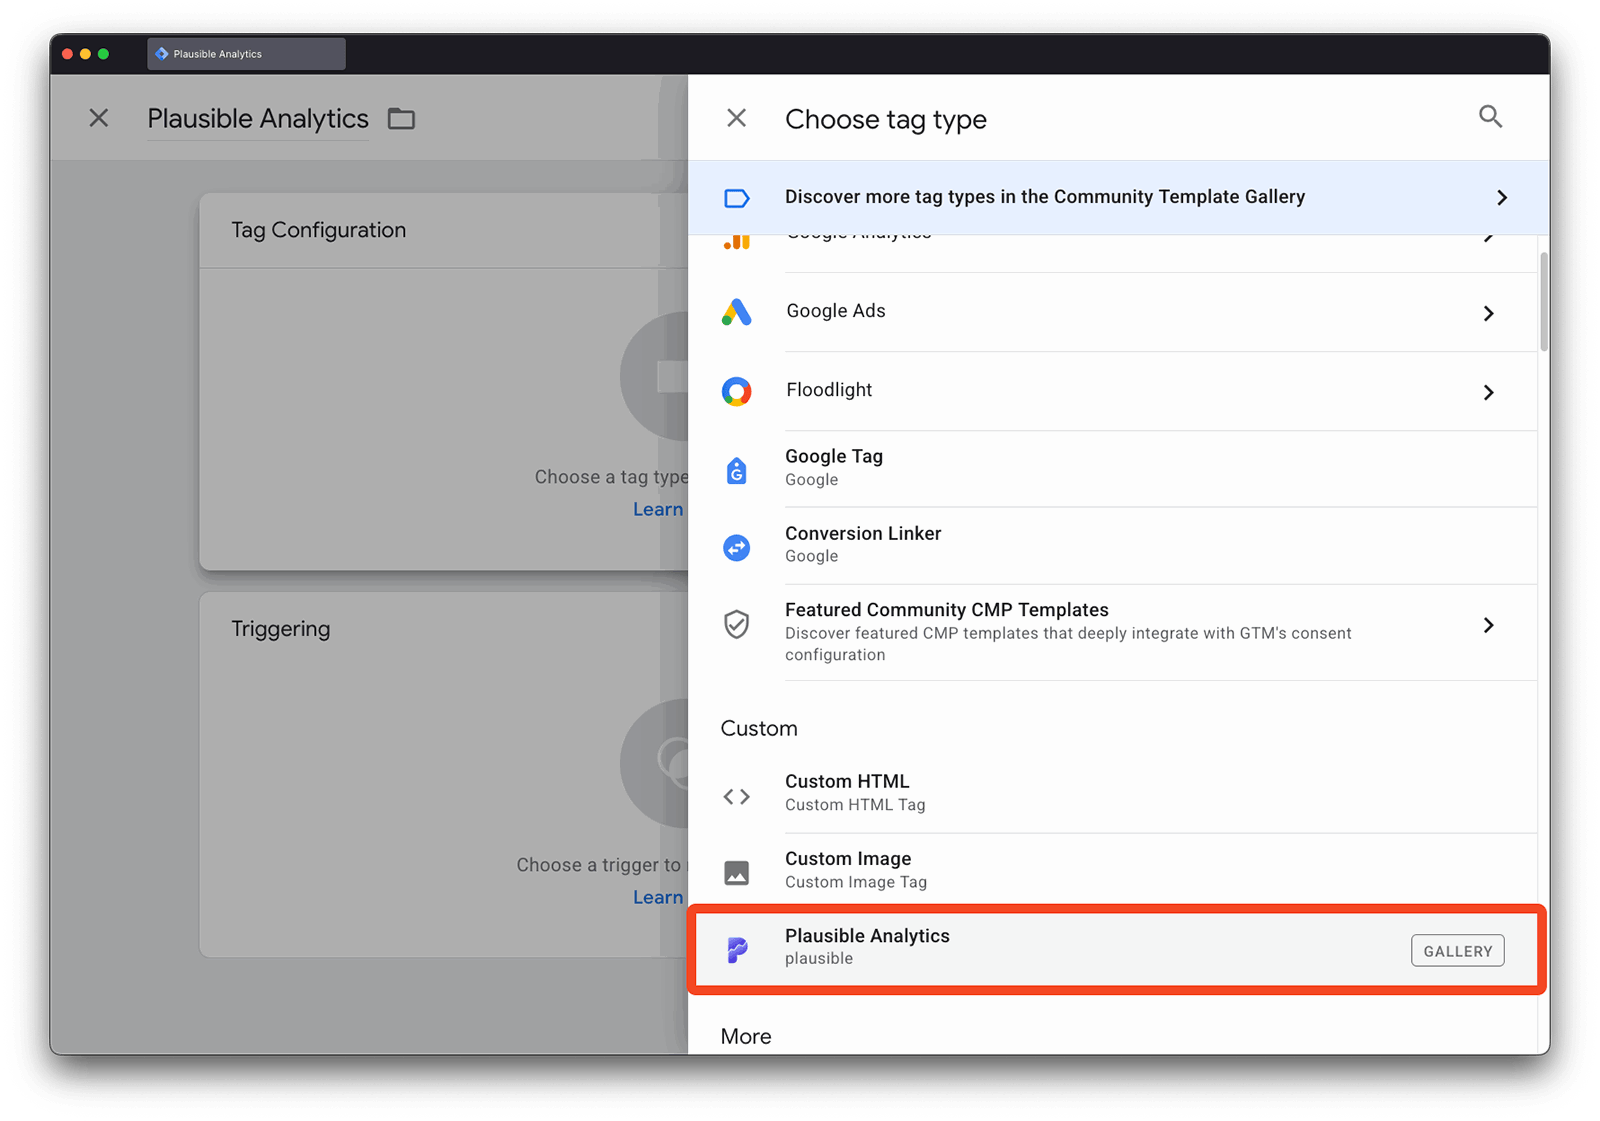
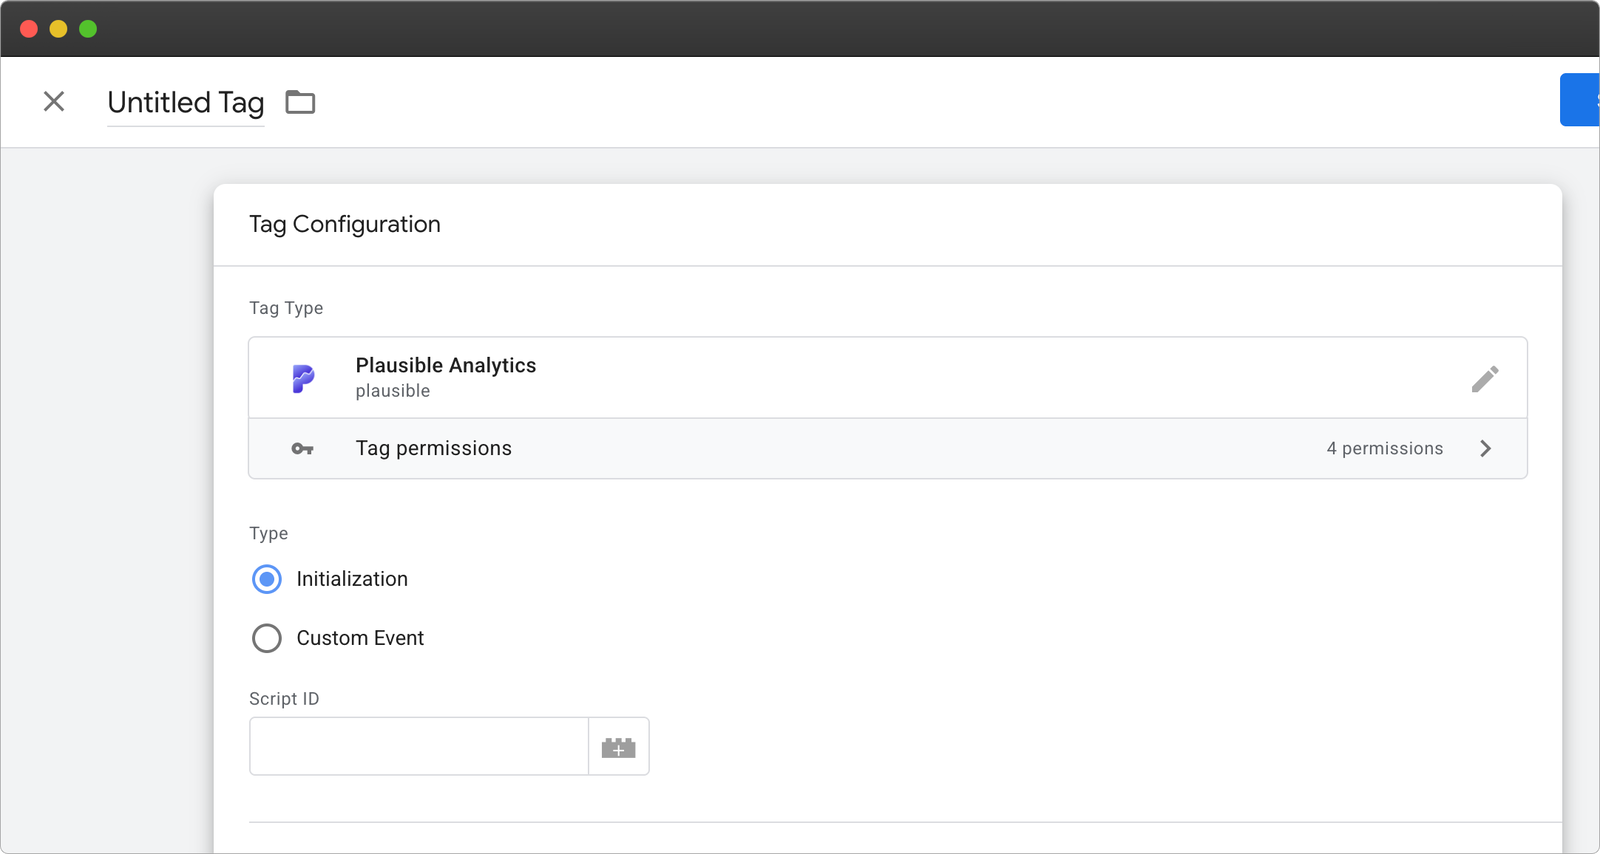
Once inside, you’ll see a Type option with two choices: Initialization or Custom Event.
- Initialization: This is mandatory for Plausible Analytics to run on your site and should be set up with one tag only.
- Custom events: This is optional and you can set up as many tags as you want. This enables you to attach event tags to different triggers in GTM so you can send custom event data to Plausible.
Setting up the Initialization Tag
Let’s first look at setting up the Initialization Tag, as this is the only mandatory step to get Plausible Analytics running with Google Tag Manager.
When you create a new tag with the Plausible Analytics template and select ‘Initialization’, there is one required field: ‘Script ID’. You can find it in Plausible during site onboarding under the “Tag Manager” tab or later in “Site Settings” → “General” → “Site Installation” → “Tag Manager”.
Scroll down to the “Triggering” section. For the tag trigger, you should select “All Pages” - “Page View”, which will ensure that Plausible will capture data on all pages.
And that’s it! For a very simple Plausible installation, you could stop here and the Plausible script will run on all pageviews and capture the core set of data.
Additional configuration options
Optionally, in this tag you can also set up some enhanced measurements. Some boxes are pre-ticked which you can uncheck if you wish to. And check the ones that you would like to track.
You can also do simple 404 tracking and set Custom Properties for pageviews (see Custom Properties section below).
To enable 404 Page tracking, simply check the box and enter the title of your website’s 404 page.
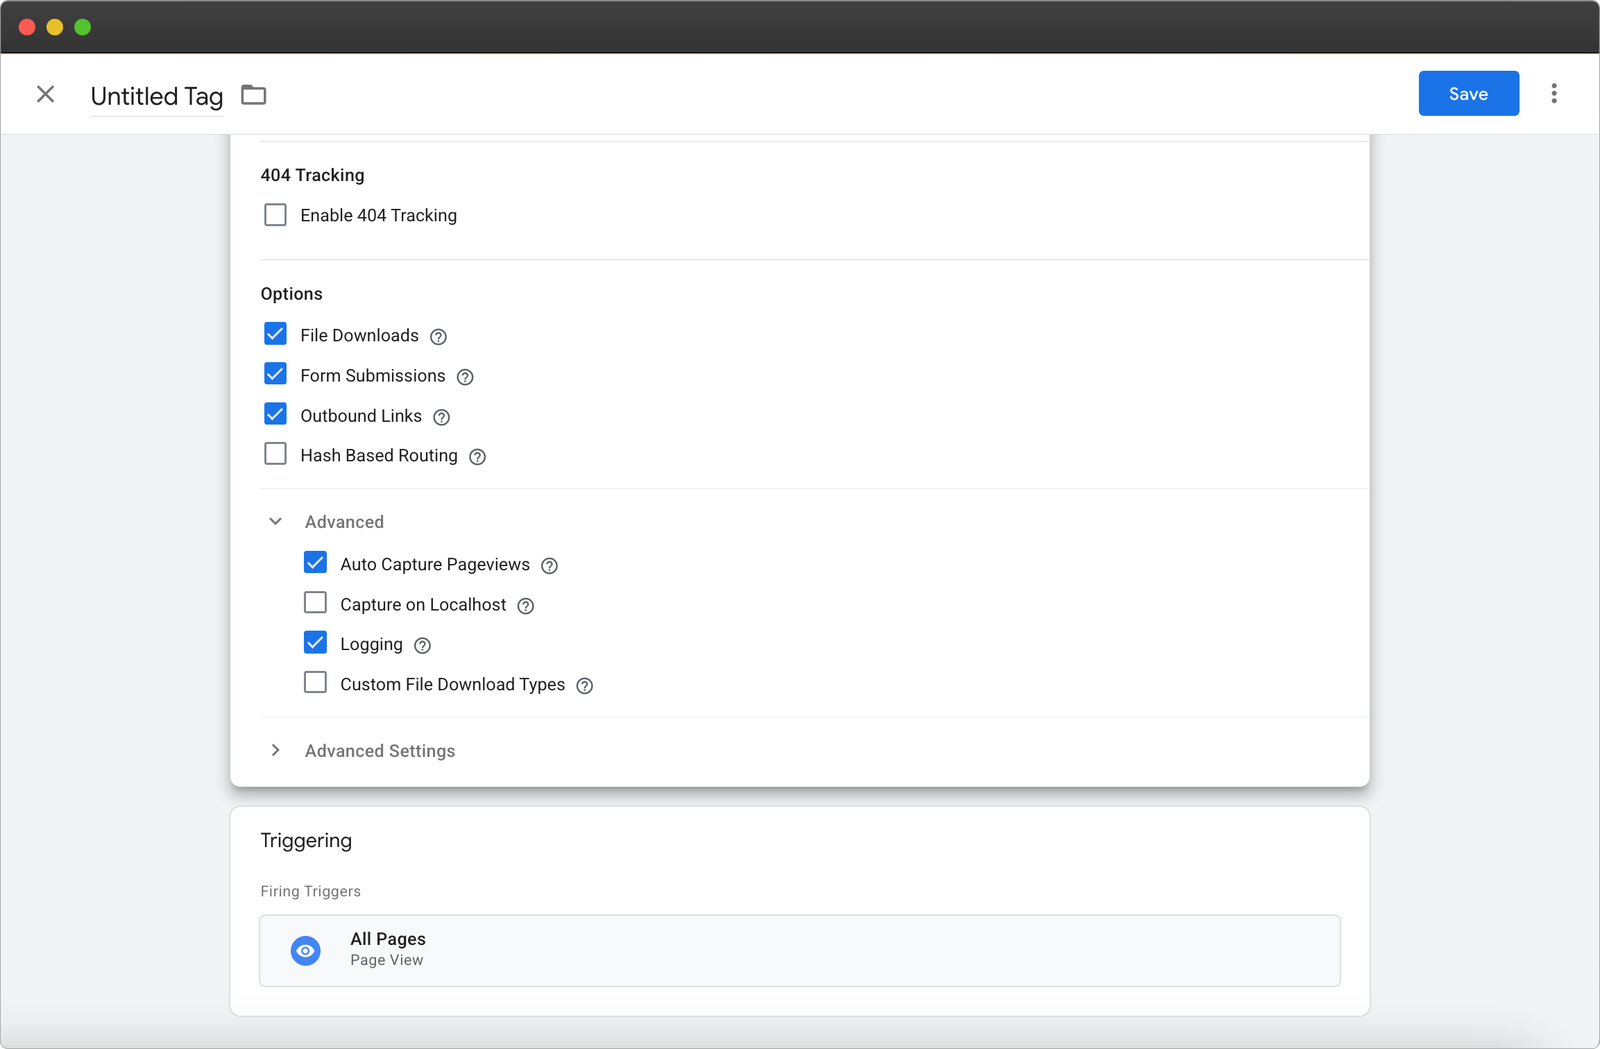
Here is the overview of the optional configuration options:
| Optional Configuration | Explanation |
|---|---|
| File Downloads | Whether to automatically track file downloads |
| Form Submissions | Whether to automatically track form submissions |
| Outbound Links | Automatically track clicks on outbound links |
| Hash Based Routing | Automatically track page paths that use a # in the URL, described here |
| Custom Properties | Allows you to attach custom properties (also known as custom dimensions in Google Analytics) when sending a pageview event. These can be configured using Google Tag Manager variables. |
| Capture on Localhost | Whether to capture events on localhost |
| Logging | Whether to log on ignored events. When enabled, any ignored events are logged to the browser console with a warning. |
| Auto Capture Pageviews | Whether to automatically capture pageviews. If this is unchecked, the script will be loaded and ready to receive events but no pageviews will be sent. You would need to recreate pageview events by creating another tag with the trigger “Page View” or similar to send the event manually. |
| Custom File Download Types | Override the default file extensions for tracking file downloads, so only your custom file type downloads will be tracked instead. |
That’s it. Just check the boxes for the things you’d like to track and you will find the relevant data in your dashboard, no coding needed.
Creating Custom Event Tags (Optional)
Unlike the Initialization Tag, you can create as many Custom Event Tags as you want. This all depends on what GTM triggers you would like to use to send data to Plausible Analytics.
Learn about custom events here.
In this section, we will run through a quick example of how it works and then run through additional configuration options.
When you create a new tag and select ‘Custom Event’, you will see only one mandatory field: ‘Event Name’.
This is the name of the custom event that you’ve set up in Plausible (if you click the icon on the right, you can set this value using a GTM variable if you would like).
For a very simple event, you then just need to select a Trigger. Two of the most useful triggers are the:
- Clicks - All Elements trigger that fires any time someone clicks an element on your site
- Clicks - Just Links which fires any time someone clicks a link on your site
You can find these options by going to Triggers > New (+) > Trigger Configuration. Then in the sidebar you will see the different trigger types, including the click options mentioned above.
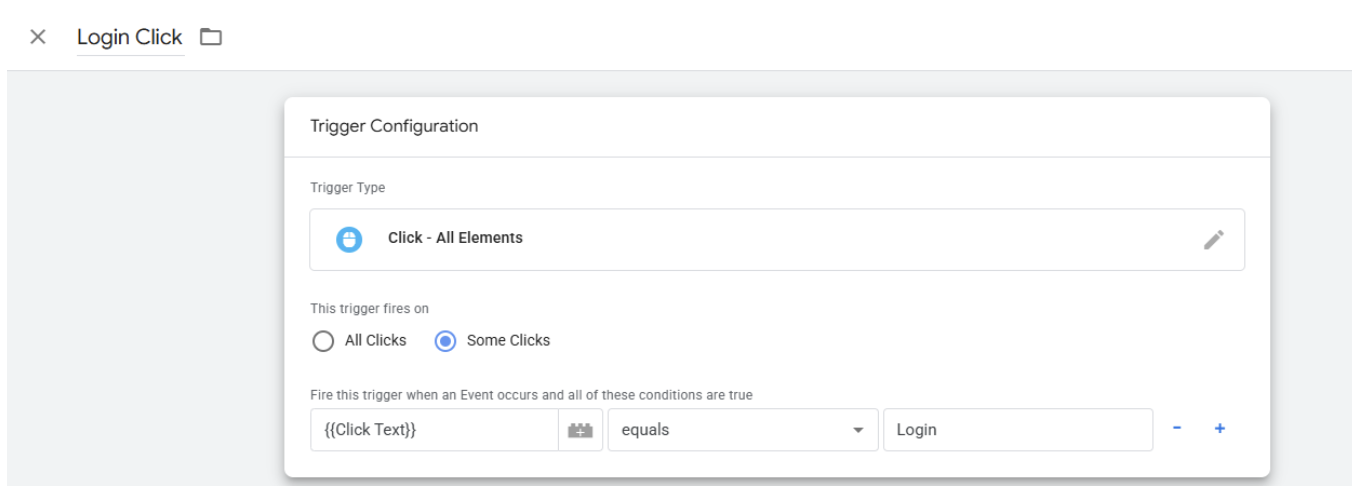
As an example, if we wanted to send an event called “Login Click” every time someone clicked the button that had text “Login”, we would have a tag that looks like this:
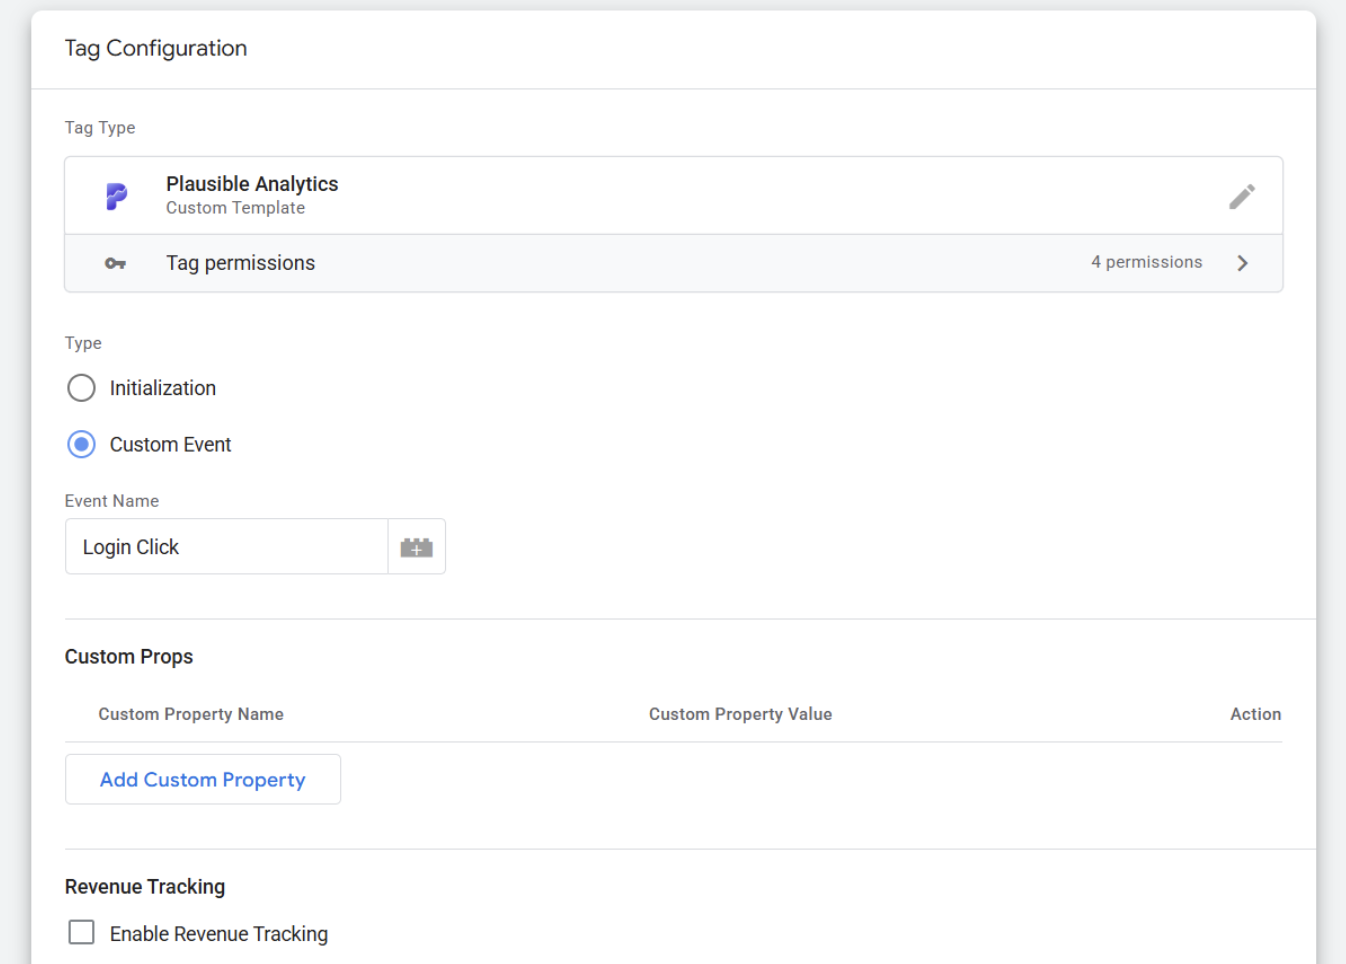
And a trigger set up as ‘Click - All Elements’ that looks like this:
Additionally, we can configure Custom Properties (see below) and Revenue Tracking data to be sent with the custom event. To add revenue data, simply tick the checkbox and enter the currency and amount that should be associated with the event. For example, if you want the amount to be $10.29, it should look like this:
![]()
You can find more details about setting up revenue tracking on your site here.
Add Custom Properties (Optional)
The Plausible GTM tag lets you send custom properties (extra data) with every pageview.
Both the Initialization Tag and the Custom Event Tags give you the option to configure one or more custom properties. In the case of the Initialization Tag, these custom properties will be attached to pageviews, while for Custom Events, they will be attached to that specific event.
As a simple example, you could send the full URL of a page to Plausible for every pageview or event by using the Built-In GTM Variable ‘Page URL’.
To do this, you would first click ‘Add Custom Property’ in the Initialization Tag. Then in the ‘Custom Property Name’ input box you will put whatever the name of the event is in Plausible. In our case, we can call it ‘page_url’.
Then we can click the icon next to the ‘Custom Property Value’ input box to see a list of all the available GTM Variables. Then we will simply select ‘Page URL’ and you will see that it populates our text field as .
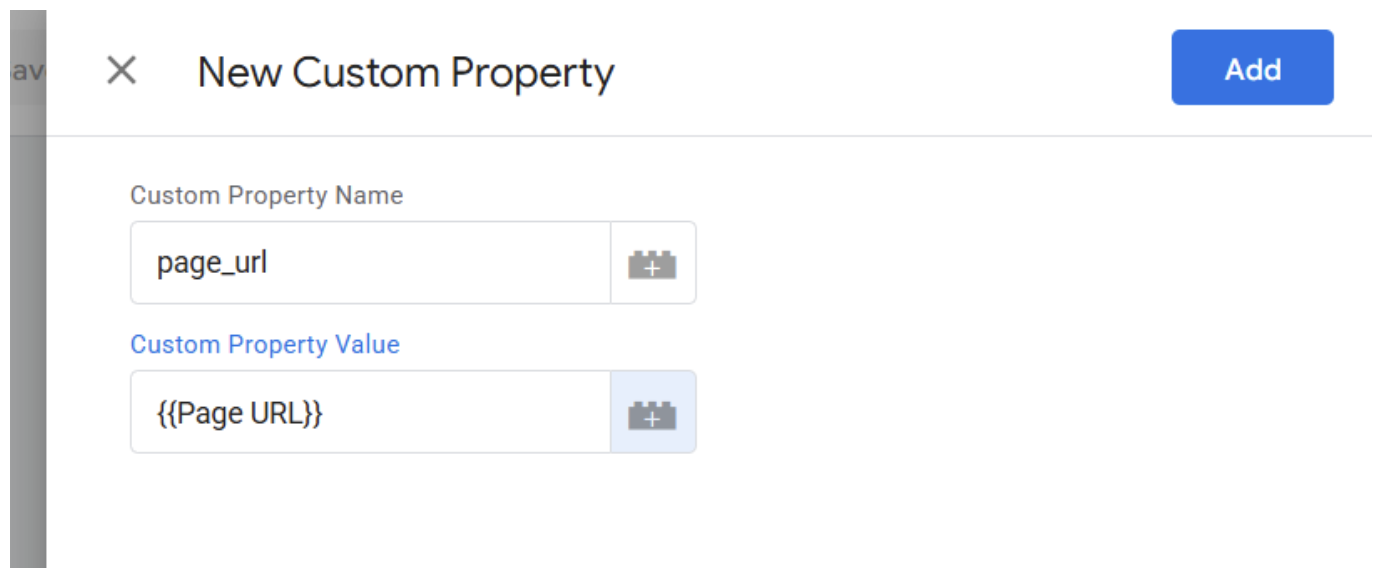
Note: if you know the ID of your GTM variable ahead of time you can just type it directly into the input box.
You can take things a step further by defining your own custom GTM variables. As an example, you could send the Page Title as a custom prop. Instead of choosing from the list of available variables, you will instead create a New Variable by clicking on the plus sign in the upper right corner.
You can then give this variable a name, like Page Title and select Javascript Variable.
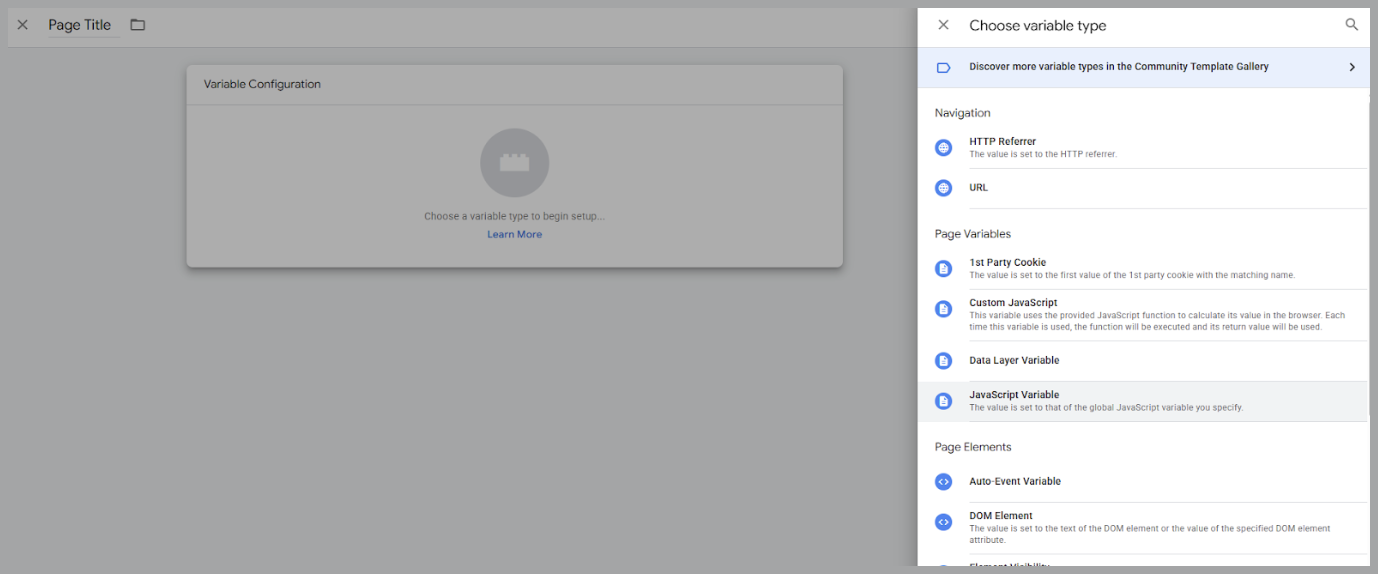
Then under Global Variable name, you simply enter ‘document.title’. This will automatically take the title of the page using Javascript and make it available as your GTM variable.

Finally, to send this to Plausible you would just need to give it a name like ‘page_title’.
With both of those variables set-up, your final custom props configuration would look like this:

You could use this custom properties set-up for either pageviews or custom events, the configuration of the custom props is the same for both.
Test your setup
Before publishing, always verify that everything works as expected. To test:
- Click the blue Preview button in your GTM dashboard.
- A new tab will open showing your website with the GTM container active.
- In the Tag Assistant Preview panel, confirm that the Plausible tag fires correctly. You can see additional information about the events that trigger the tag and the data that is being sent.
If you see the tag firing and data appearing in your Plausible dashboard, your setup is complete!
What’s next?
Now that your site is tracking with Plausible via GTM, you can:
- Get the most out of your Plausible experience
- Connect your Google Search Console to Plausible for seeing the search terms driving you traffic directly in the Plausible dashboard
- Customize your reporting by connecting with Looker Studio
Enjoy Plausible!