Adding Plausible with Google Tag Manager
If you already use Google Tag Manager, you can add Plausible with our official template from the GTM template gallery. It handles pageviews, custom events, file downloads, form submissions and more, with no changes to your site's code.
GTM is optional. You can also add the Plausible script to your site directly, or check our integration guides for instructions specific to your platform.
Before you begin
You'll need:
- Access to your Google Tag Manager account, with permission to edit and publish containers
- A Plausible account with your site added. Register here and then add your site
Copy your script ID
When you add a site, Plausible shows the installation screen. Choose the Tag Manager tab and copy the script ID. You'll need it in a minute.
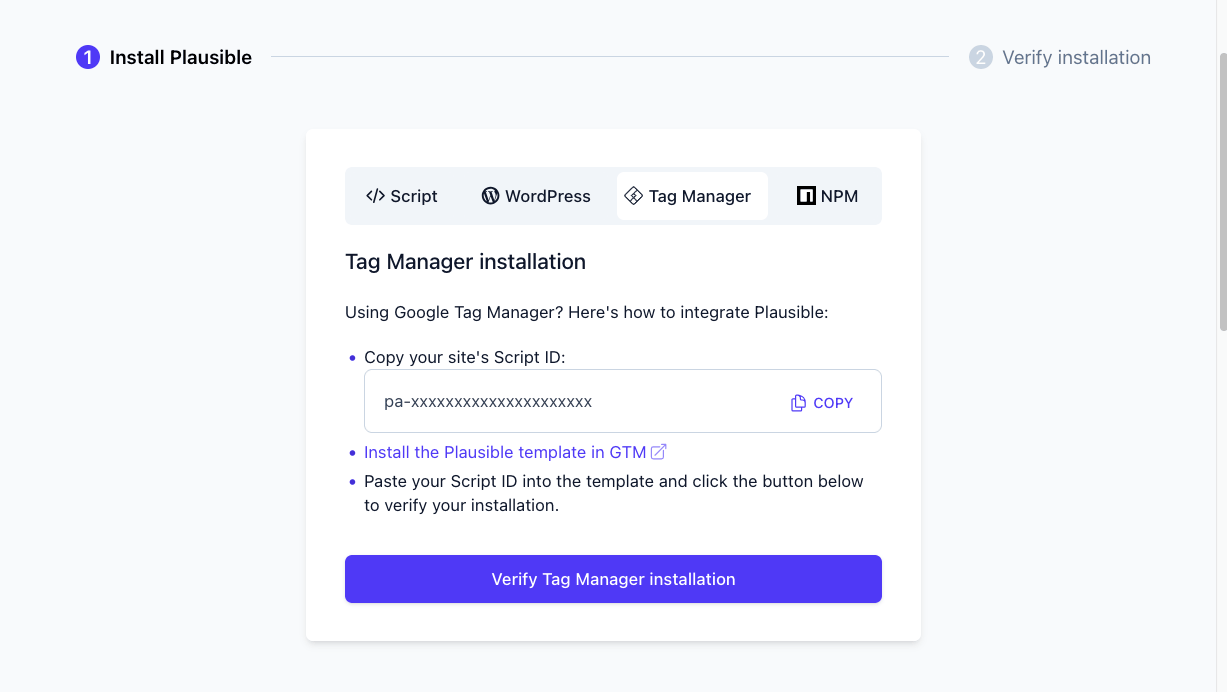
For a site you've already added, you'll find the same screen in your site settings under General > Site installation > Tag Manager.
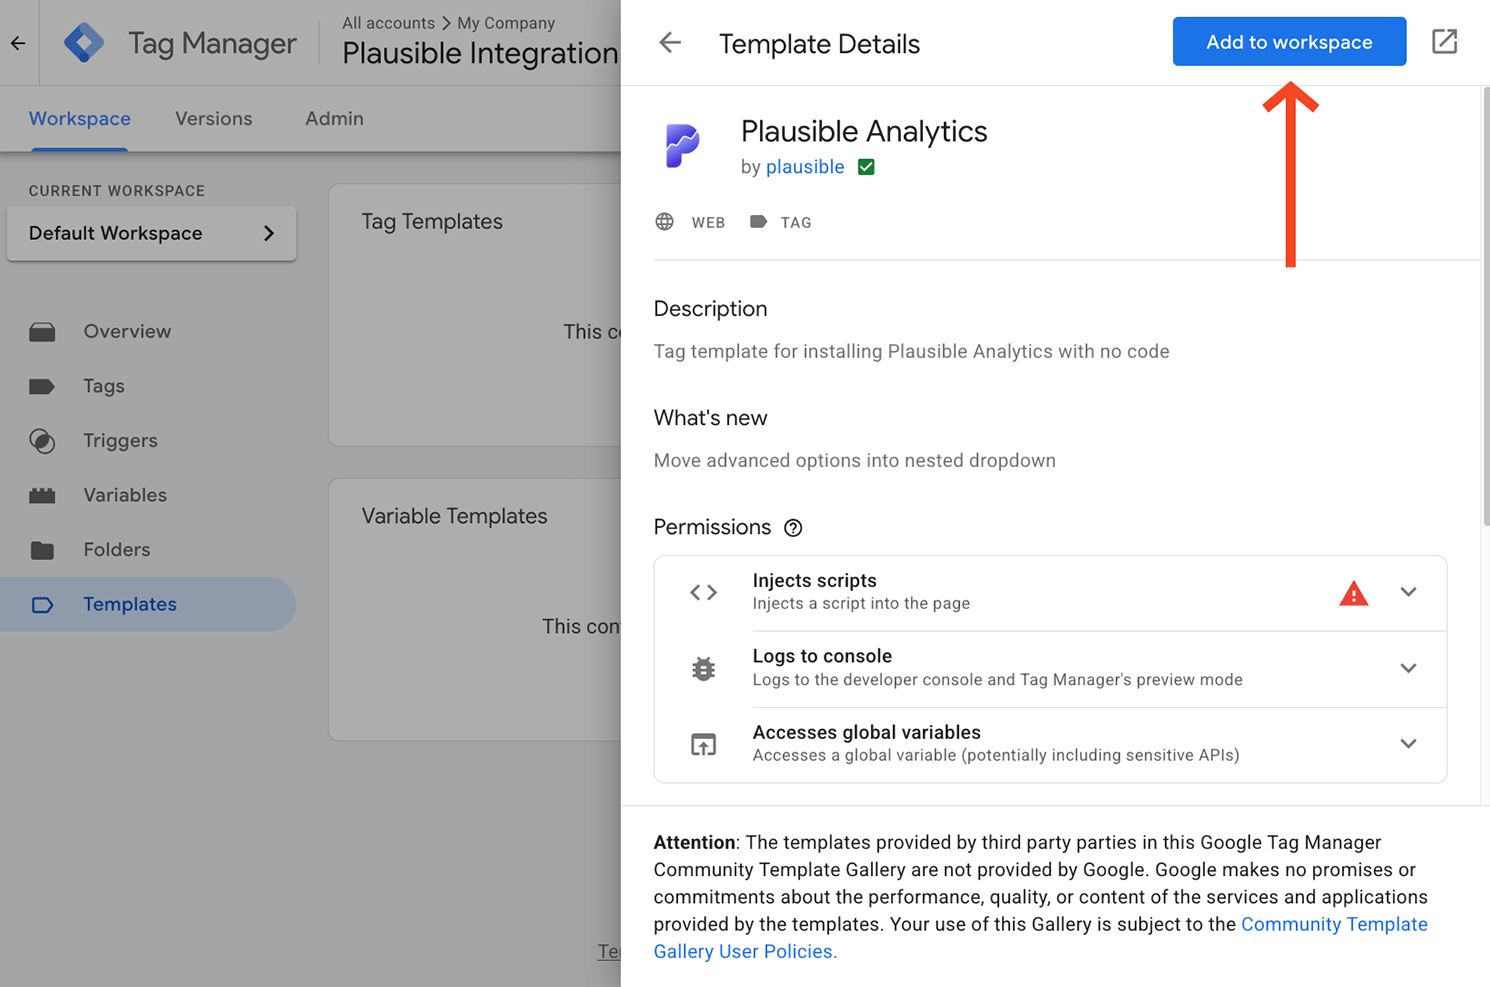
Install the Plausible template in GTM
Add the Plausible Analytics template from the GTM template gallery to your container.
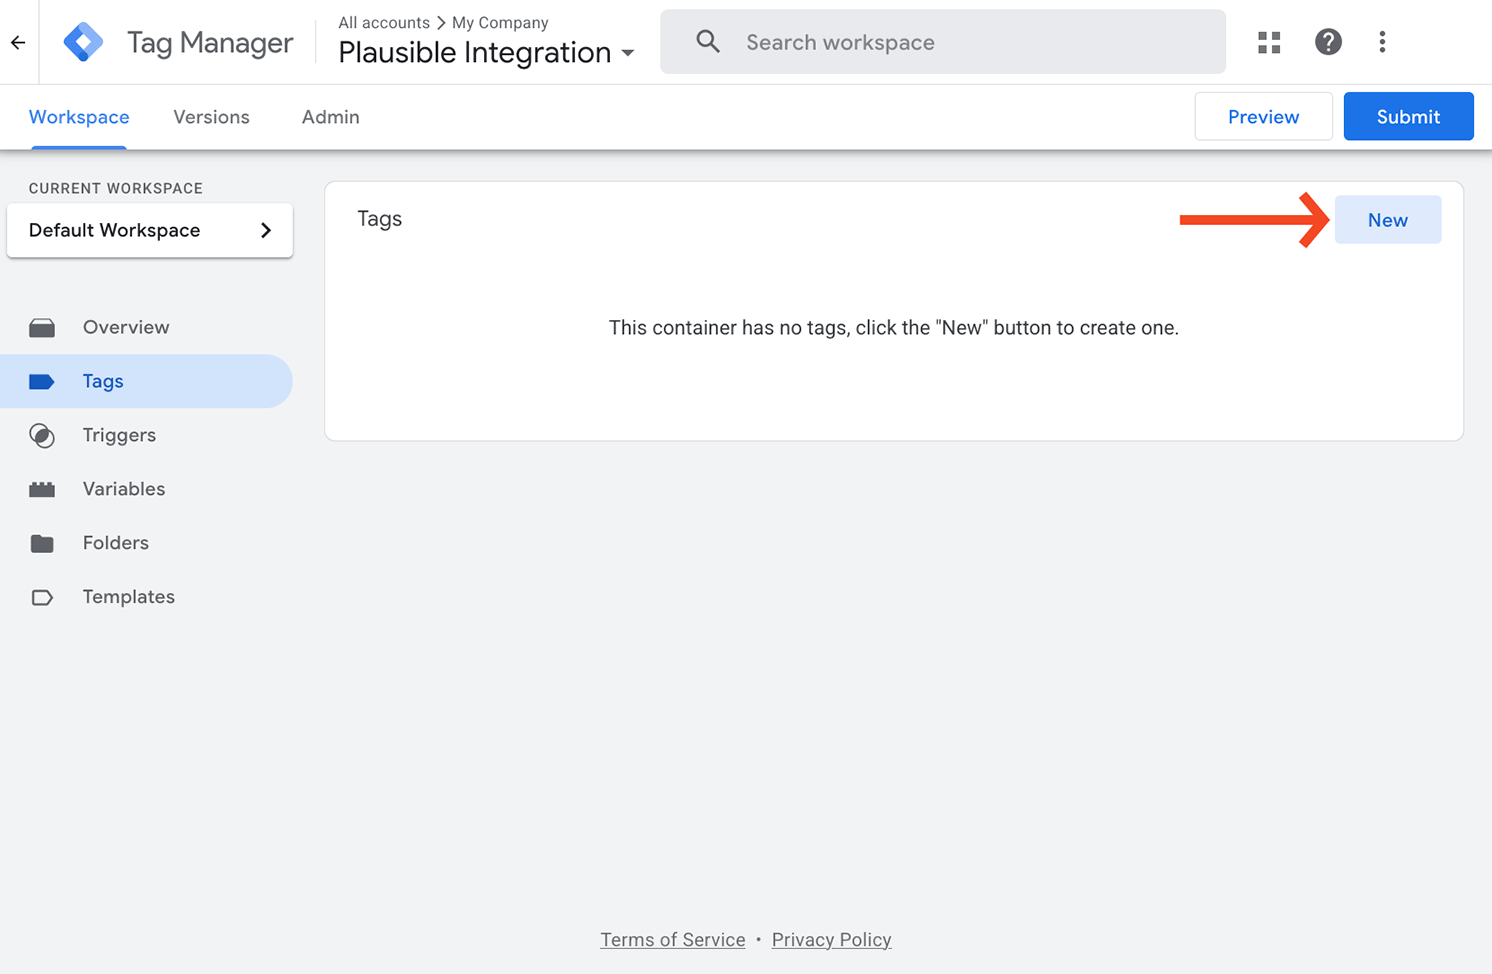
Create a new tag
In your GTM workspace, go to Tags and click New.
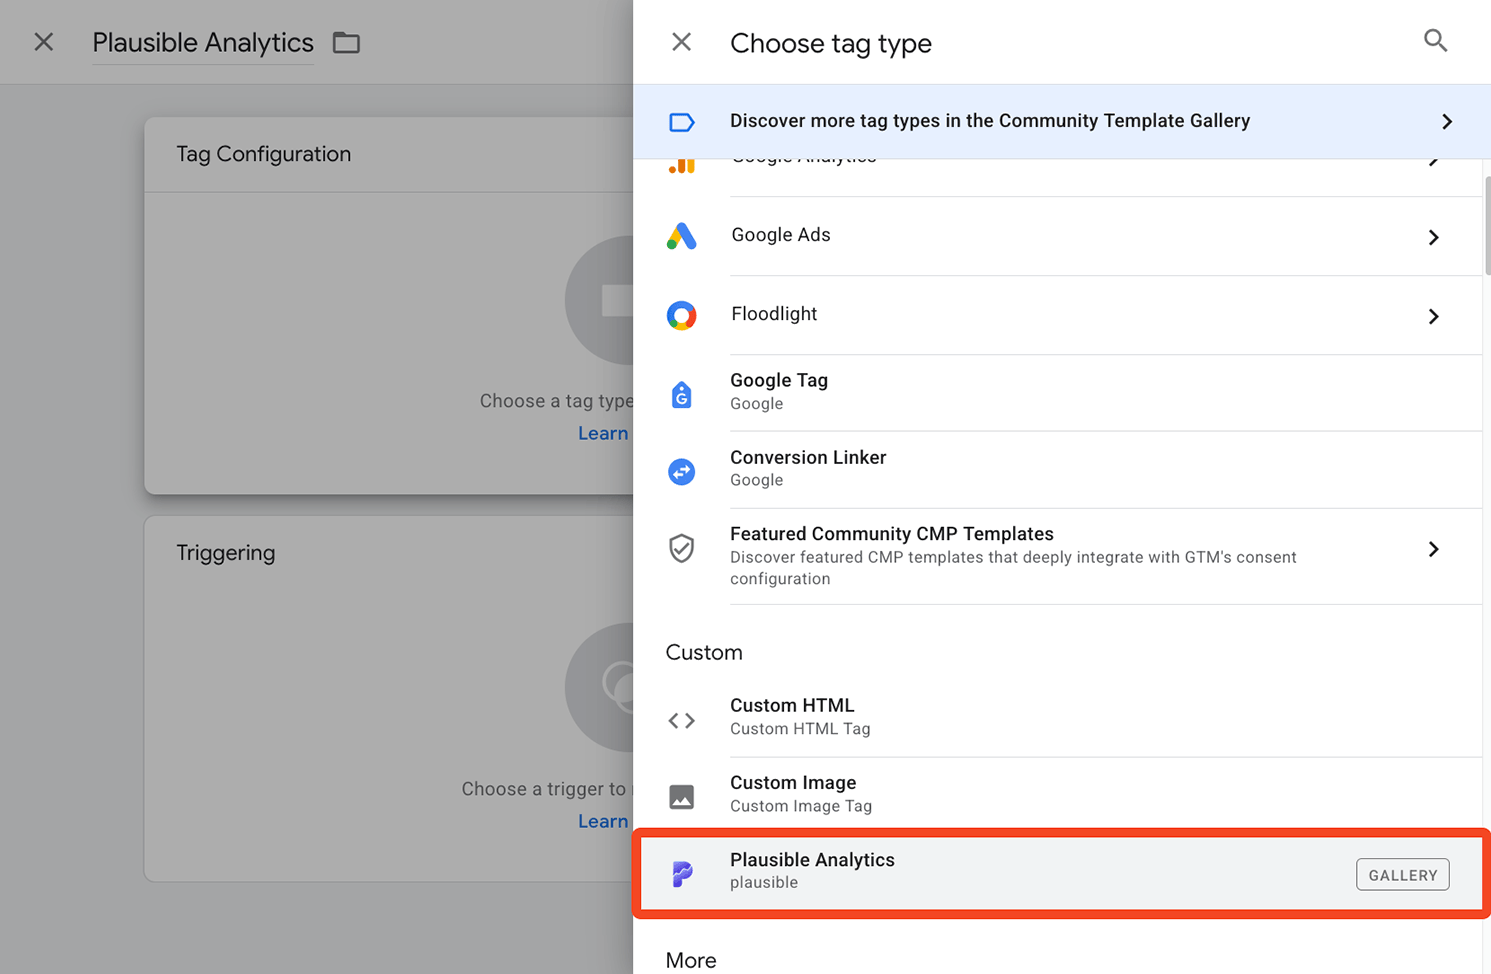
Choose the Plausible Analytics template you just installed.
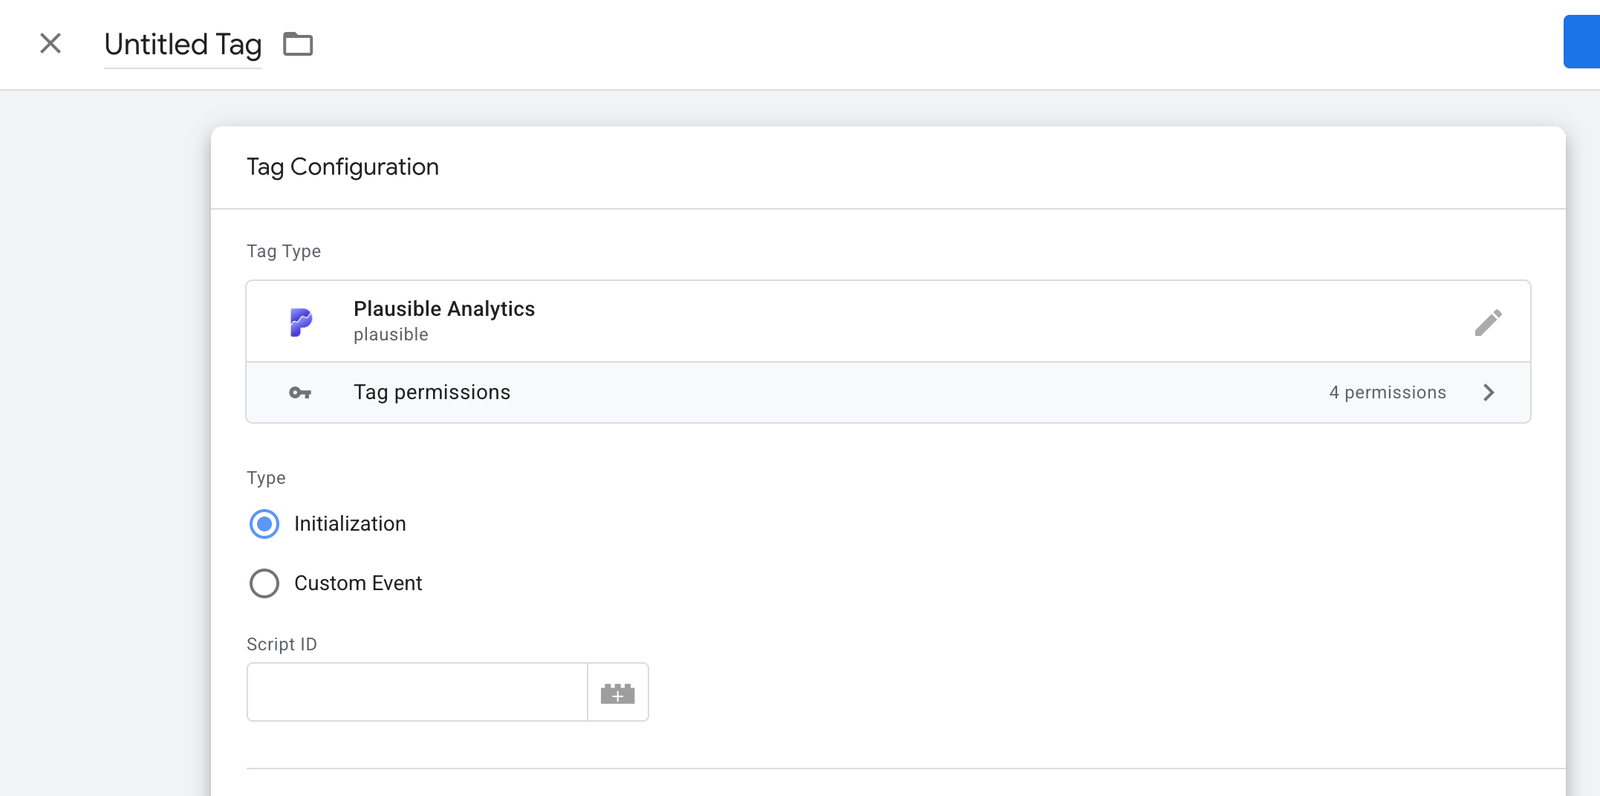
The tag has a Type option with two choices:
- Initialization loads Plausible on your site. You need exactly one tag of this type.
- Custom Event sends a custom event to Plausible when a GTM trigger fires. This is optional and you can create as many as you like.
Set up the initialization tag
Create a tag with the type Initialization and paste your script ID into the Script ID field.
Under Triggering, choose All Pages (Page View) so Plausible loads on every page.
That's all a basic installation needs. Save the tag, then test and publish your container.
Optional measurements
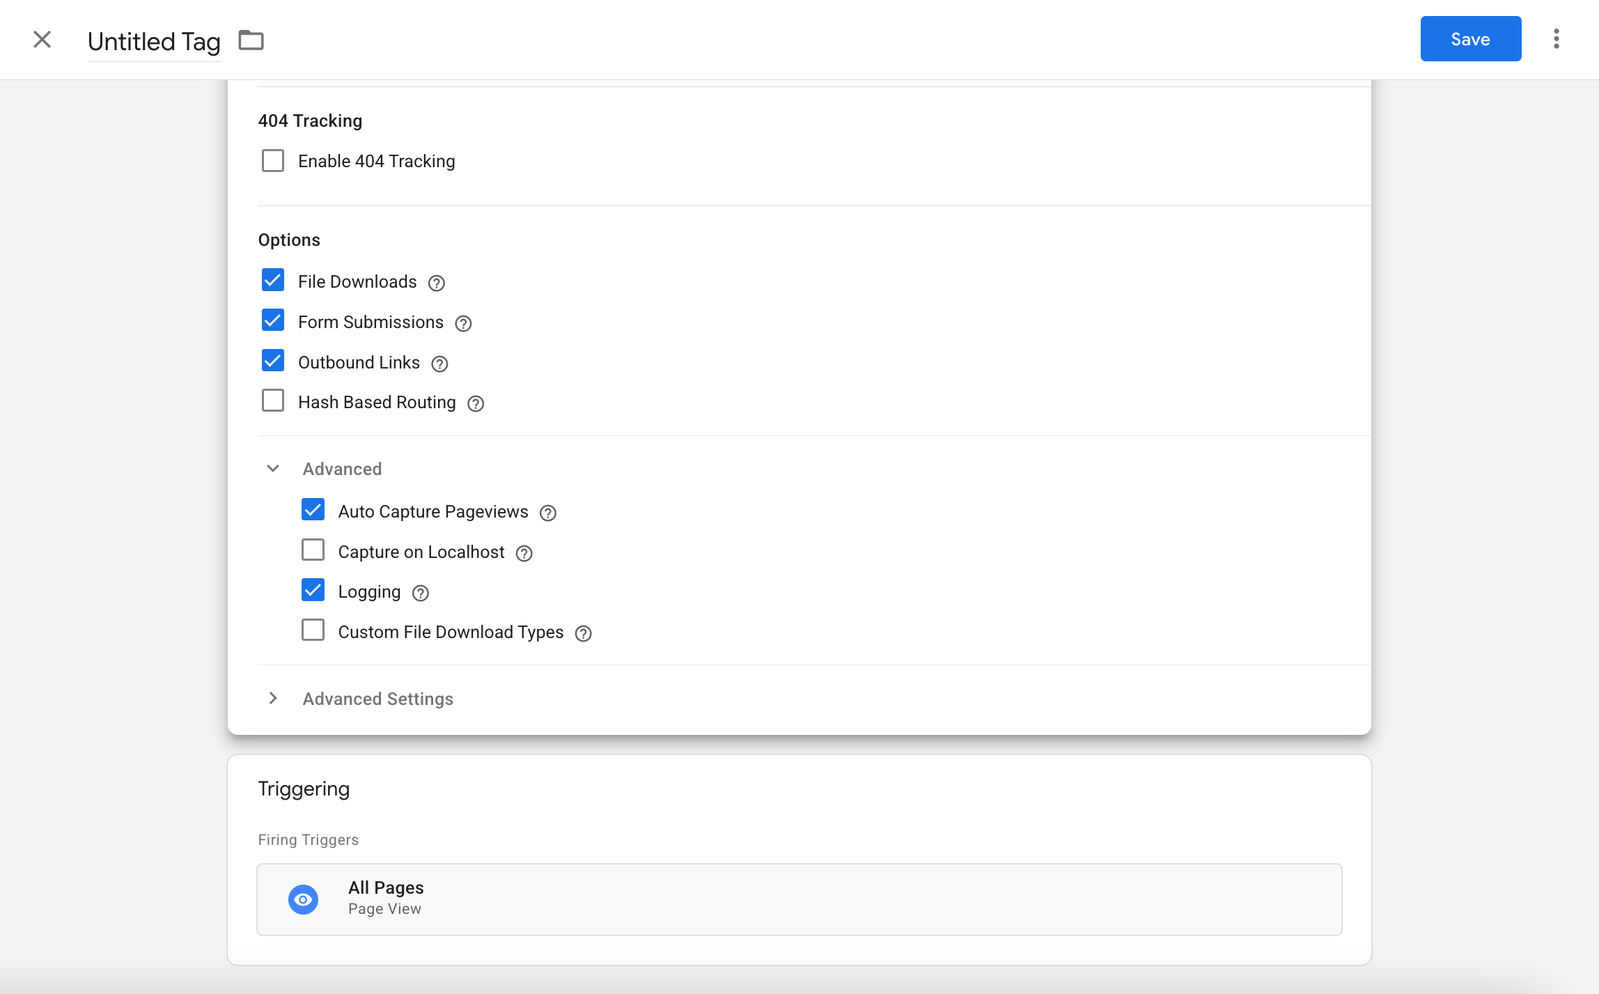
The initialization tag also has options for enhanced measurements. Some are ticked by default. Untick the ones you don't need and tick the ones you want.
| Option | What it does |
|---|---|
| File Downloads | Automatically tracks file downloads |
| Form Submissions | Automatically tracks form submissions |
| Outbound Links | Automatically tracks clicks on outbound links |
| Hash Based Routing | Tracks page paths that use a # in the URL. See hash-based routing |
| 404 Tracking | Tracks 404 error pages. Tick the box and enter the title of your site's 404 page |
| Custom Props | Attaches custom properties to pageviews. See Add custom properties |
| Capture on Localhost | Records events on localhost |
| Logging | Logs ignored events to the browser console with a warning |
| Auto Capture Pageviews | Sends pageviews automatically. If you untick it, the script loads but sends no pageviews until you send them yourself with another tag, for example one with a Page View trigger |
| Custom File Download Types | Replaces the default file extensions for file download tracking, so only the types you list are tracked |
Create custom event tags
Custom event tags send a custom event to Plausible whenever a GTM trigger fires. Add the event as a custom event goal in your site settings first so it shows in your dashboard.
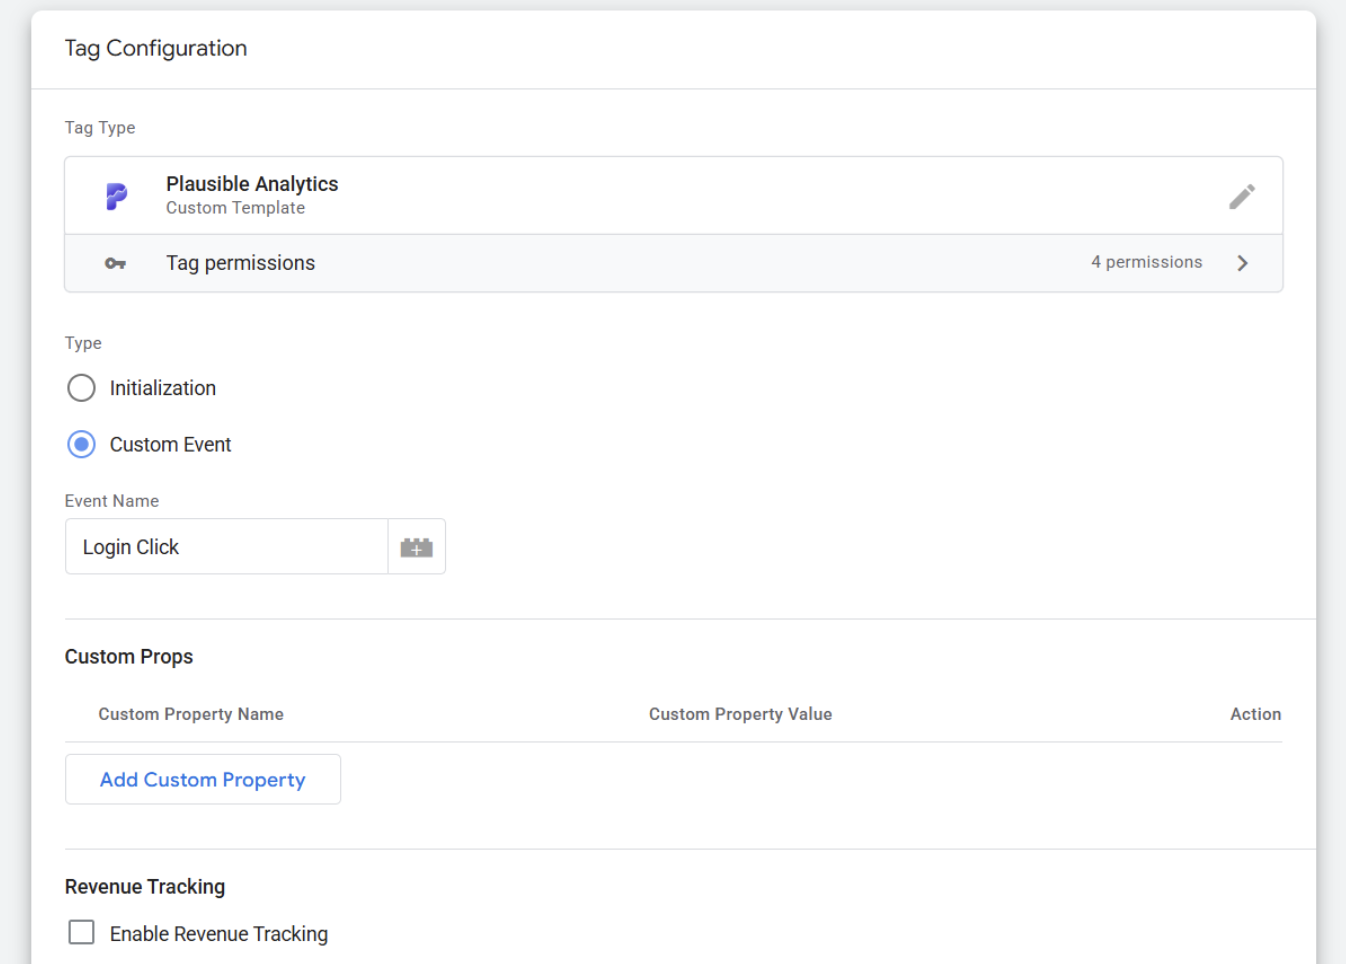
Create a tag with the type Custom Event and enter the Event Name. It must match the goal name in Plausible. You can also set it from a GTM variable with the icon next to the field.
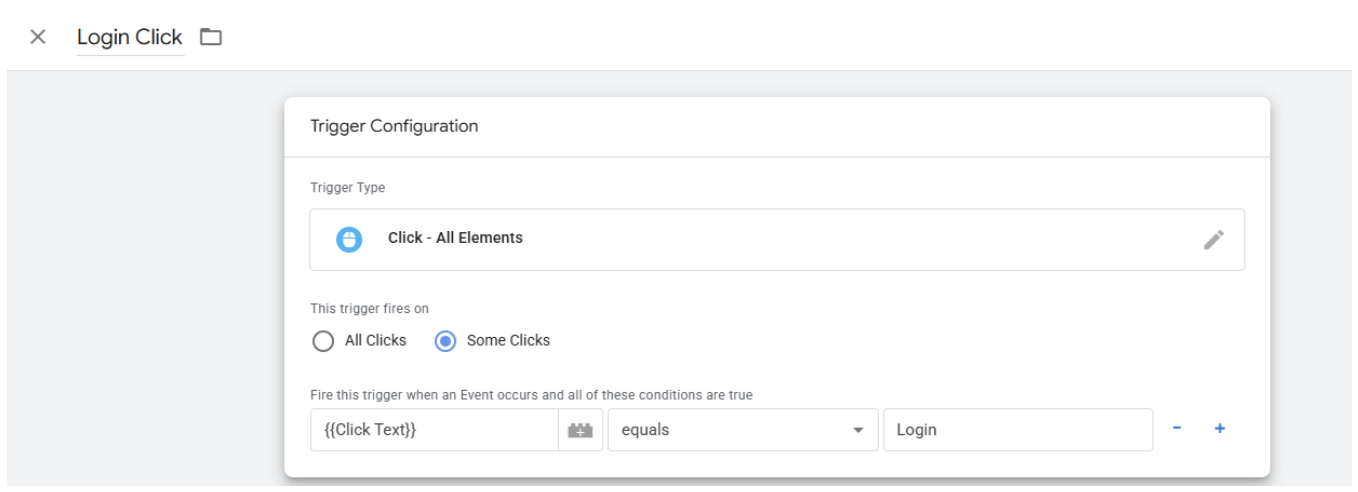
Then choose a trigger. Two useful ones are Click - All Elements, which fires on any click on your site, and Click - Just Links, which fires on link clicks. You'll find them under Triggers > New > Trigger Configuration.
For example, to send an event called "Login Click" whenever someone clicks a button with the text "Login", the tag looks like this:
And the trigger, using Click - All Elements, like this:
Send revenue with a custom event
To attach revenue to an event, tick Revenue Tracking in the custom event tag and enter the currency and amount. For an amount of $10.29 it looks like this:
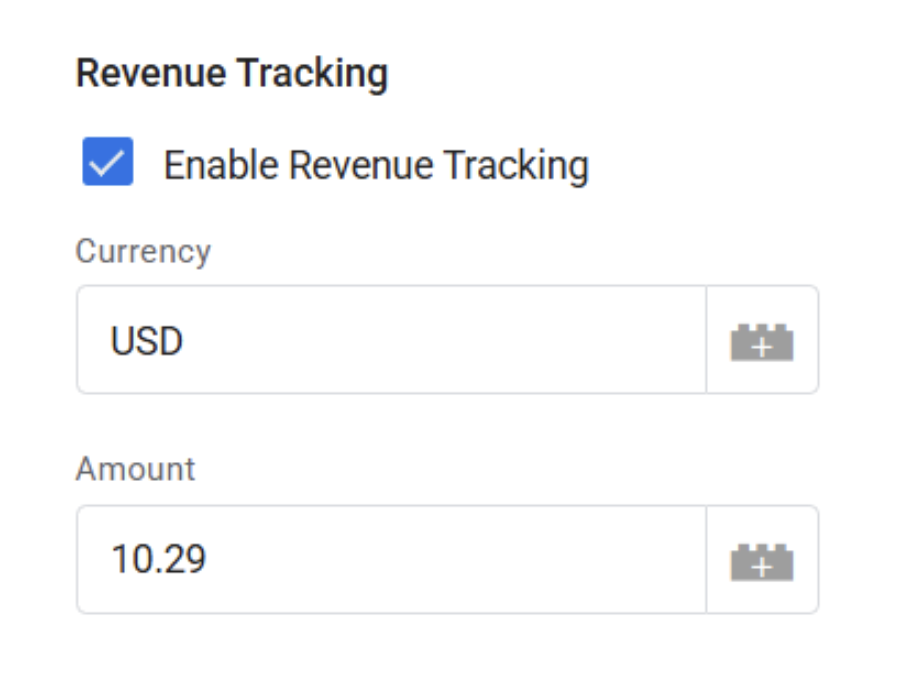
The goal needs revenue tracking turned on in Plausible. See ecommerce revenue tracking for the details.
Reuse events from your data layer
If your site already sends events to Google Analytics 4 through GTM, you don't need to change anything on your site. Those events are already in the data layer and the Plausible tag can listen for them too.
This works for any event your site pushes, such as sign_up, generate_lead, add_to_cart, begin_checkout or purchase. For each one you want in Plausible:
- Create the goal. In your site settings add a custom event goal, for example "Add to Cart".
- Create the trigger. In GTM go to Triggers > New > Custom Event and enter the data layer event name, for example
add_to_cart. It needs to match exactly what your site pushes. - Create the tag. Add a new Plausible Analytics tag, choose Custom Event and enter the goal name from step 1. Select the trigger from step 2 and save.
To send extra details with the event, such as a product category or a form name, create a Data Layer Variable for that field and add it as a custom property.
Signups and lead forms are often covered by the Form Submissions option without any extra setup, so check that before recreating them from the data layer.
Example: purchases with revenue
GA4 ecommerce setups push a purchase event that includes the order value and currency, so you can send revenue to Plausible as well:
- In Plausible, add a custom event goal called "Purchase", turn on revenue tracking and choose your base currency.
- In GTM go to Variables > New > Data Layer Variable. Create one with the name
ecommerce.valueand another one withecommerce.currency. Leave the Data Layer Version on Version 2. - Create a Custom Event trigger for
purchase. - Create a Plausible Analytics Custom Event tag called "Purchase" with that trigger. Tick Revenue Tracking, click the icon next to Currency and pick your currency variable, then do the same next to Amount with your value variable.
To test it, place a test order in Preview mode and check in Tag Assistant that the Plausible tag fired with the amount and currency filled in.
Add custom properties
Both tag types can send custom properties. On the initialization tag they're attached to pageviews. On a custom event tag they're attached to that event. The setup is the same for both.
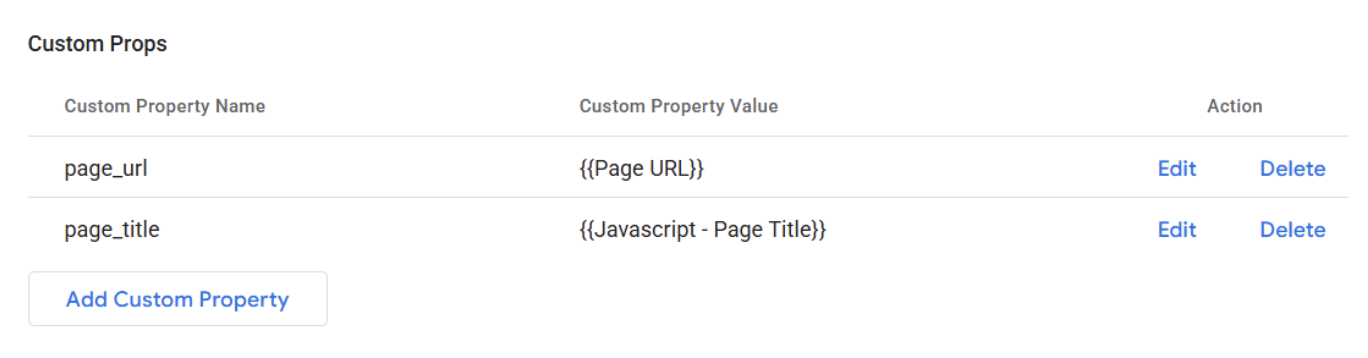
For example, to send the full URL of every page as a property, click Add Custom Property in the initialization tag. Enter a Custom Property Name, such as page_url. Click the icon next to Custom Property Value and choose the built-in Page URL variable. The field then shows {{Page URL}}.
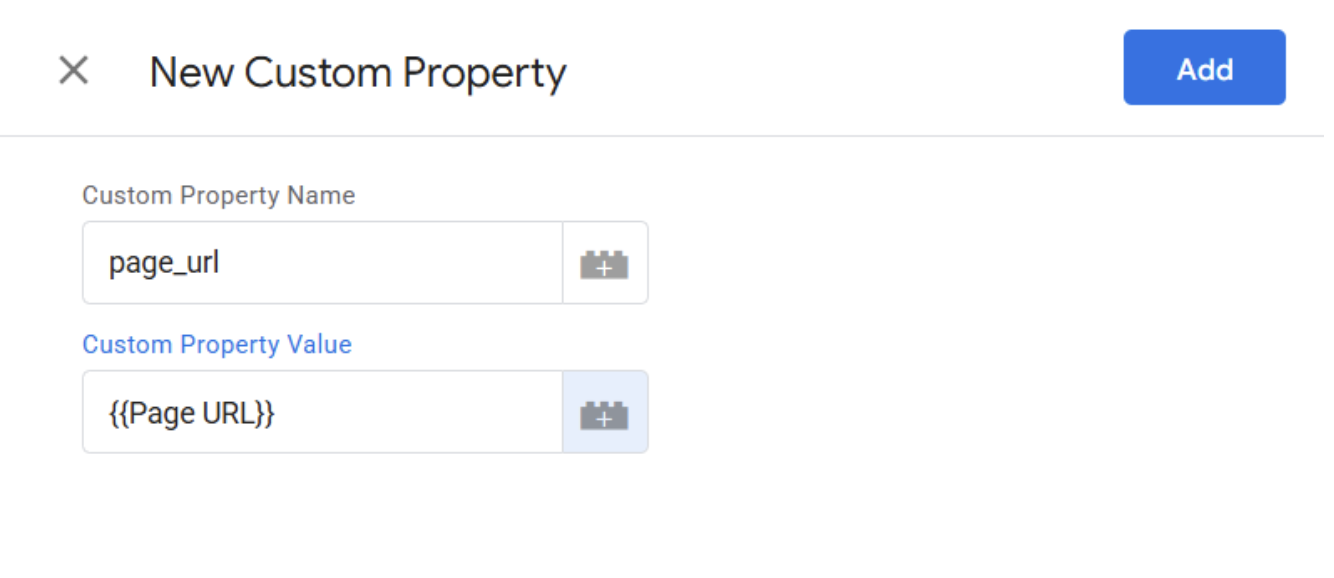
If you know the name of a GTM variable, you can also type it straight into the field.
You can use your own variables too. To send the page title, create a new variable with the plus icon, name it "Page Title" and choose JavaScript Variable as the type.
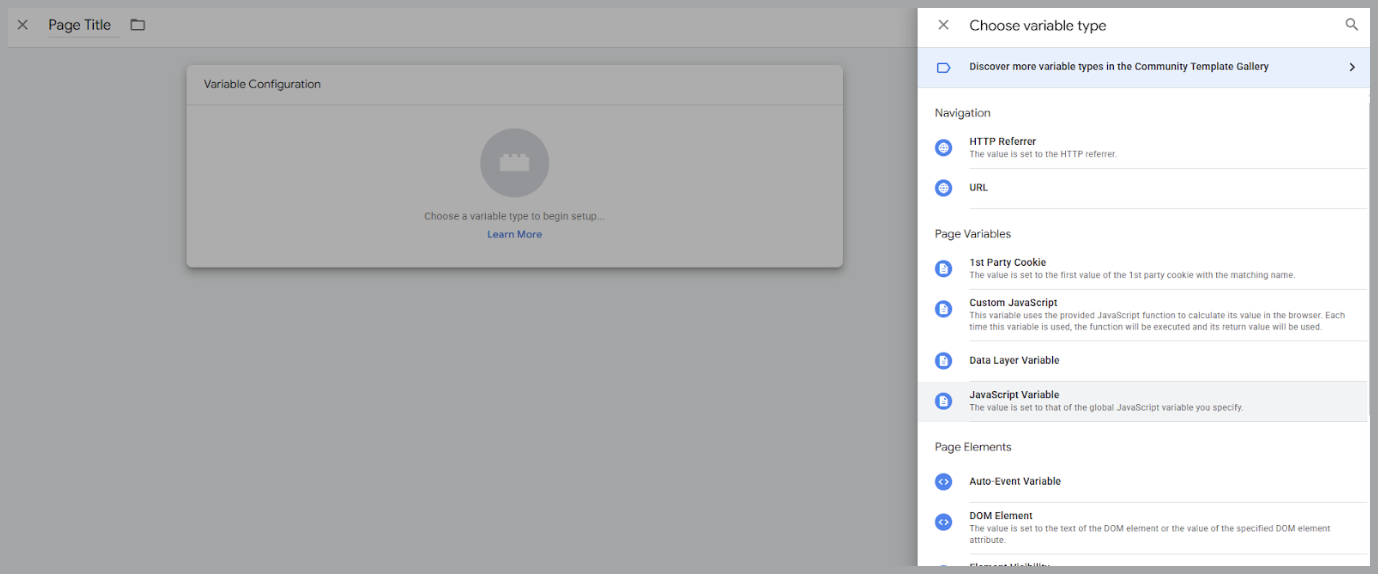
Under Global Variable Name, enter document.title.
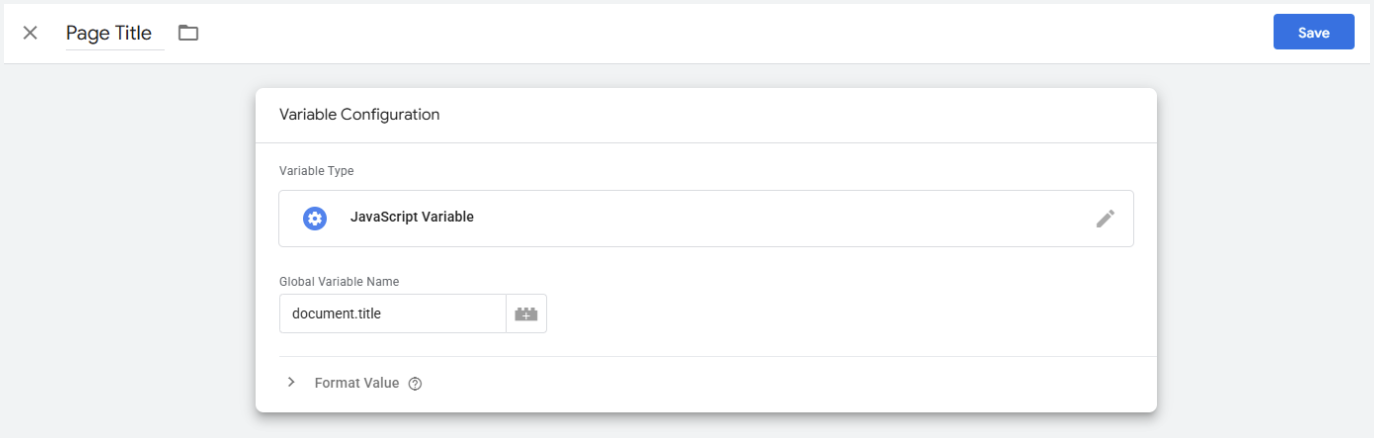
Then add it as a custom property, for example as page_title. With both properties set up, the configuration looks like this:
Test your setup
- Click Preview in your GTM workspace.
- Your site opens in a new tab with the GTM container active.
- In the Tag Assistant panel, check that the Plausible tag fires. You can see which events triggered it and what data was sent.
If the tag fires and the visit shows in your Plausible dashboard, your setup works.
Publish your container
Preview mode only runs in your own browser session. To start tracking real visitors, publish the container:
- Click Submit in the top-right corner of your GTM workspace.
- Add a version name and description if you like. It helps you keep track of changes.
- Click Publish.
Until you publish, no data is collected from visitors to your site.
Troubleshooting
No stats after setting up
Make sure the container is published, not only saved, and that the initialization tag uses the All Pages trigger. Then check that the script ID matches the one in your Plausible site settings. For other causes, see troubleshoot your integration.
Custom events not firing
Use GTM's Preview mode to confirm the tag fires. Check that the trigger conditions match the actual interaction, that the event name matches your goal in Plausible exactly, and that the container is published. See custom events troubleshooting for more.
What's next?
- Get the most out of Plausible
- Connect Google Search Console to see the search terms bringing you traffic
- Build custom reports with the Data Studio connector